When it comes to installing concrete caps or stone caps—whether for walls, pillars, steps, or other structures—precision is essential. These finishing elements not only provide a polished, professional appearance but also protect your hardscaping from damage caused by weather, water infiltration, and everyday wear.
Poor installation techniques can quickly undermine both function and aesthetics. Problems such as cracking, shifting, and moisture penetration can occur if caps or tops are not properly aligned, leveled, and secured. Since these features often serve as both decorative accents and functional surfaces—such as seating areas, step treads, or weather resistive barriers—there’s no room for error.
While a professional installation is always the best choice to ensure long-lasting results, it’s still helpful for property owners to understand the basics of concrete and stone cap installation. Knowing what’s involved can help you make informed decisions, spot potential issues early, and ensure your investment is protected.
In the next section, we’ll explore the finer details of installing caps and tops, including the right materials, preparation steps, and techniques to ensure they remain strong, stable, and visually appealing for years to come.
What Are Caps and Tops and Their Importance in Landscaping
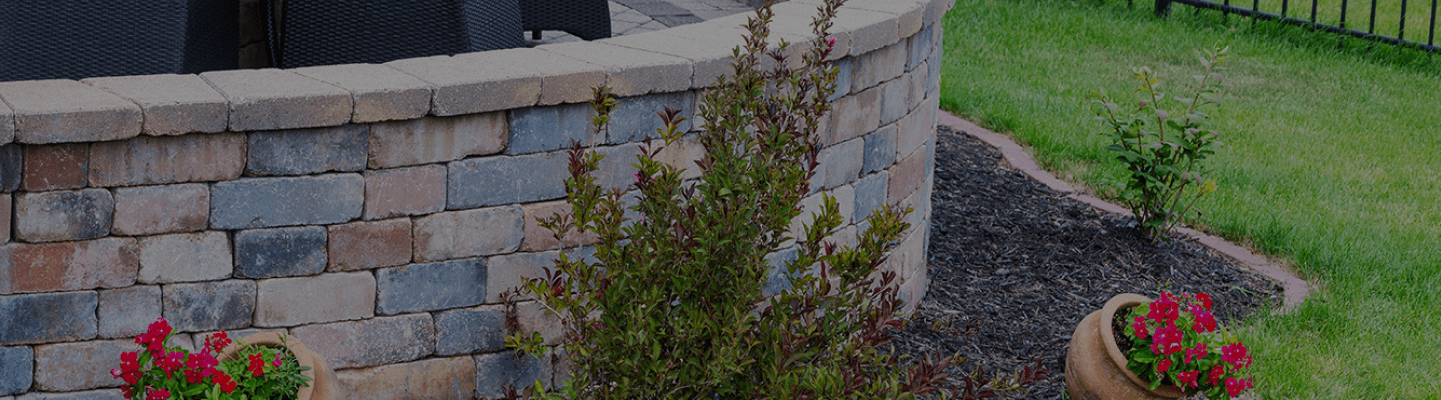
In masonry structures and hardscaping projects, concrete caps and tops refer to the flat, horizontal elements placed on top of walls, columns, and other vertical features. Their purpose is twofold—adding a refined, finished appearance and providing critical protection against weather and wear.
While these caps can be made from either stone or concrete, concrete is often preferred for its durability, strength, and versatility in design. Beyond aesthetics, caps and tops contribute to the overall structural integrity of retaining walls, pillars, and other masonry elements. A well-prepared base is essential, as it provides the foundation for long-term stability and performance.
Common applications for concrete caps and tops include:
- Retaining wall: Creating a flat, stable surface that prevents water infiltration while enhancing the wall’s finished look.
- Pillars and columns: Adding an elegant finishing touch to the ends of exterior walls—whether straight or curved—while protecting vertical elements.
- Garden walls and fencing: Offering a cohesive, decorative appearance and potential for integrated seating or planting areas.
- Outdoor kitchen counters: Serving as durable, weather-resistant surfaces for food preparation and dining in outdoor living spaces.
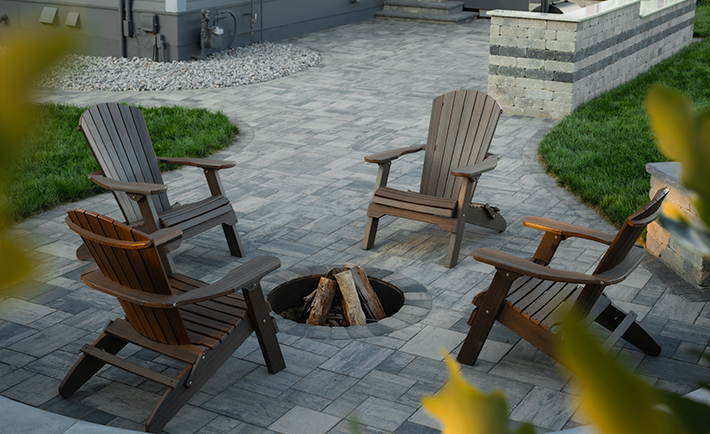
- Seating: Providing comfortable seating on low retaining walls, around fire pits, or along garden edges.
Regardless of the application, proper installation is critical. From preparing a level, stable base to securing each cap in place, every step must be executed with precision. Following best practices ensures that caps and tops remain both functional and visually appealing for years to come.
Why Concrete Should Be Your Top Choice for Caps
Selecting the right material for your caps and tops is essential for achieving both long-lasting durability and a visually appealing finish. While stone and concrete are the most popular choices, concrete offers unmatched versatility—able to replicate the natural beauty of stone while also delivering sleek, modern design options.
By choosing concrete caps or concrete tops, you gain a material that not only withstands the elements but can also be customized to match your exact style and project needs.
Advantages of Concrete Caps and Tops:
- Enhanced Durability and Longevity: Concrete resists cracking, erosion, and decay, even in extreme weather conditions like heavy rain, snow, and temperature swings. It’s built to protect your outdoor structures for decades.
- Versatile Design Options: Concrete can be molded into nearly any shape or size and colored to mimic natural stone or create bold, contemporary looks. From rustic to modern, the design possibilities are virtually endless.
- Uniformity and Consistency: Achieve a cohesive appearance with consistent color, texture, and dimensions—ideal for large-scale projects or spaces that require a polished, unified look.
- Low Maintenance: Concrete requires minimal upkeep to maintain its beauty, making it a practical choice for busy homeowners and low-maintenance landscapes.
- Cost-Effective Solution: Often more affordable than natural stone, concrete also allows for a more efficient installation process, helping reduce overall labor costs.
Whether used for retaining walls, seating areas, pillars, or outdoor kitchen surfaces, concrete tops and caps deliver a stylish, durable, and budget-friendly solution for any hardscaping project.
Preparing for Installation
Before you begin installing your concrete or stone caps, proper preparation is essential. Skipping the planning phase can lead to poor fit, instability, and costly repairs down the road.
The process begins with assessing the site, confirming compatibility, taking accurate measurements, and gathering the necessary materials and tools.
1. Assess the Installation Area
Start by carefully evaluating the area where the cap or top will be placed. The surface should be level, stable, and free from debris that could compromise the installation.
- Base Stability: Walls, fire pits, outdoor kitchen counters, or columns should have a solid gravel base for proper water drainage and long-term stability.
- Structural Soundness: If working with a stone or concrete block wall, ensure it’s in good condition and able to support the weight of the cap.
A thorough assessment at this stage ensures you’re building on a strong foundation.
2. Confirm Structural Compatibility
Before moving forward, verify that the existing structure is suitable for stone or concrete caps.
- Shape and Fit: Make sure the wall or pillar form works with the size and style of cap you’ve selected. Most caps require a slight overhang, especially when intended for seating.
- Load Capacity: Check that walls and columns are level, stable, and capable of handling the added weight.
Soil Conditions: For taller walls (over four feet) or heavy load-bearing designs, soil reinforcement may be necessary. In such cases, consult an engineer or experienced hardscaping professional.
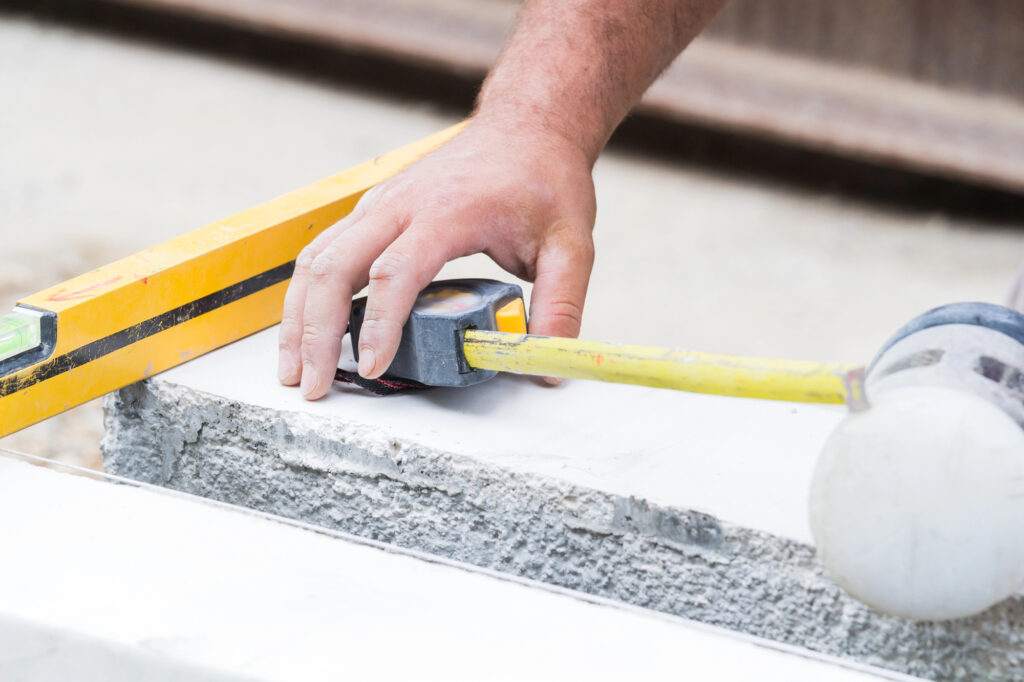
3. Measure for Accuracy
Accurate measurements are key to selecting the right-sized caps or tops.
- Measure the length and width of the wall or pillar in linear feet.
- Calculate the total square footage needed.
- Use coarse sand to level the surface before placement.
- Double-check that each cap or top will fit snugly on the prepared surface.
Taking the time to assess, confirm, and measure properly ensures your stone or concrete cap installation will be stable and visually appealing.
4. Purchase the Right Number of Caps or Tops
Once you’ve taken accurate measurements of your wall or pillar, determine how many concrete caps or stone caps you’ll need for the installation.
- Order Extra: Always purchase slightly more than your exact estimate. Extras can account for cutting mistakes, damage during installation, or adjustments needed for curved walls, uneven edges, or slight width variations along a straight wall.
- Seamless Appearance: Matching the number and style of caps to your structure’s dimensions ensures a clean, continuous look that enhances the overall visual appeal.
5. Gather the Necessary Materials and Tools
Before beginning your cap installation, assemble all required materials and tools to ensure the process goes smoothly.
Essential Tools:
- Masonry trowel
- Level
- Rubber mallet
- Tape measure
- Safety gloves
- Safety goggles (especially if cutting)
- Concrete saw (for fitting wall caps to size)
- Caulking gun (for adhesive or mortar application)
- Wheelbarrow (for mixing mortar)
- Mixing paddle (for blending mortar)
- Masonry or soft bristle brush (for cleaning surfaces)
- Hammer drill (if mounting to a concrete wall)
- Masonry screws or anchors (if extra securing is needed)
Materials:
- Concrete adhesive or mortar (check manufacturer instructions and recommendations for the correct type and amount)
Pro Tip: Many suppliers of concrete caps and tops can help you calculate the right amount of adhesive or mortar based on your specific project size and design.
The Basics of Installing a Concrete Cap and Top
Installing concrete or stone caps and tops on retaining walls, pillars, or other structures doesn’t have to be complicated.
By following basic installation guide and techniques, you can achieve a secure, durable, and visually appealing finish. These steps also apply if you plan to use caps as seating or for other functional surfaces.
1. Clean the Surface
Start with a clean, smooth, and level base to ensure proper adhesion and stability.
- Remove Debris: Brush away dirt, dust, or old mortar to create a solid foundation.
- Repair Cracks: Fill any cracks or gaps to prevent future damage and ensure the caps sit evenly.
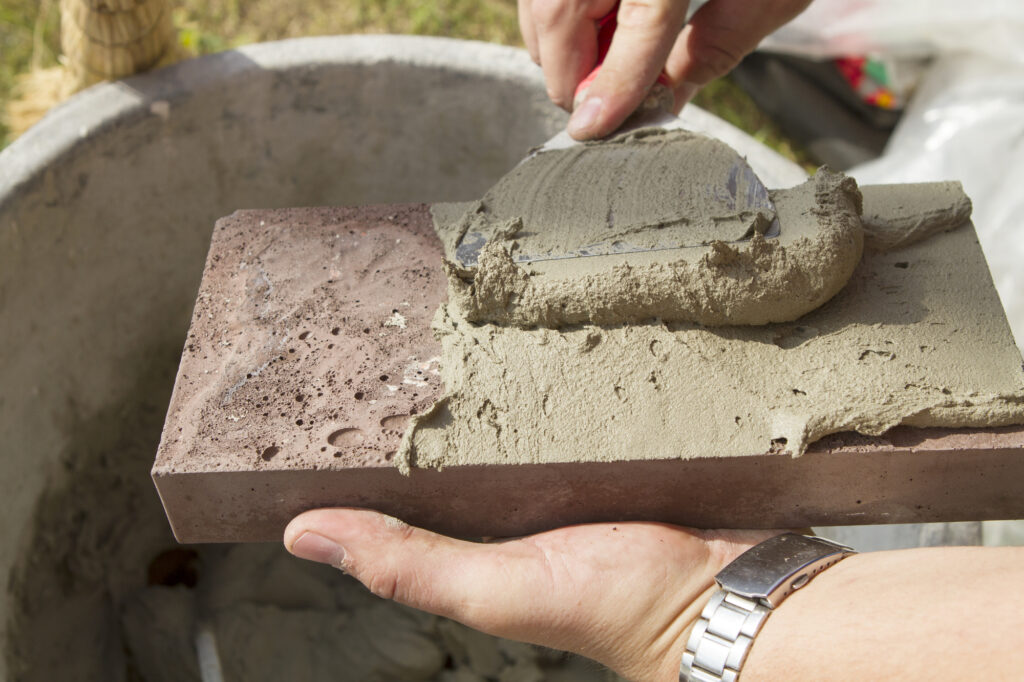
2. Apply Concrete Adhesive or Mortar and Level the Surface
A strong bond is essential for long-lasting results.
- Apply Mortar or Adhesive: Spread a layer on the clean, leveled surface of your wall or pillar.
- Level the Base: Use a level to ensure the adhesive layer is flat and even before placing caps.
- Spread Carefully: Even application prevents shifting or loosening, ensuring stability over time.
Attention to detail during this step contributes significantly to the strength and appearance of your installation.
3. Place Caps Carefully, Ensuring Alignment and Level
Proper placement ensures a professional, polished look.
- Start at the Center: Begin in the middle of the structure and work outward for even weight distribution.
- Check Alignment Frequently: Use a level to maintain accuracy as you go.
- Adjust Gently: Tap caps lightly with a rubber mallet to avoid damage while securing them in place.
- Final Check: Once all caps are placed, double-check alignment and level for a seamless, finished appearance.
By following these basic steps, your concrete or stone caps will not only enhance the visual appeal of your retaining walls or pillars but also provide long-lasting stability and functionality.
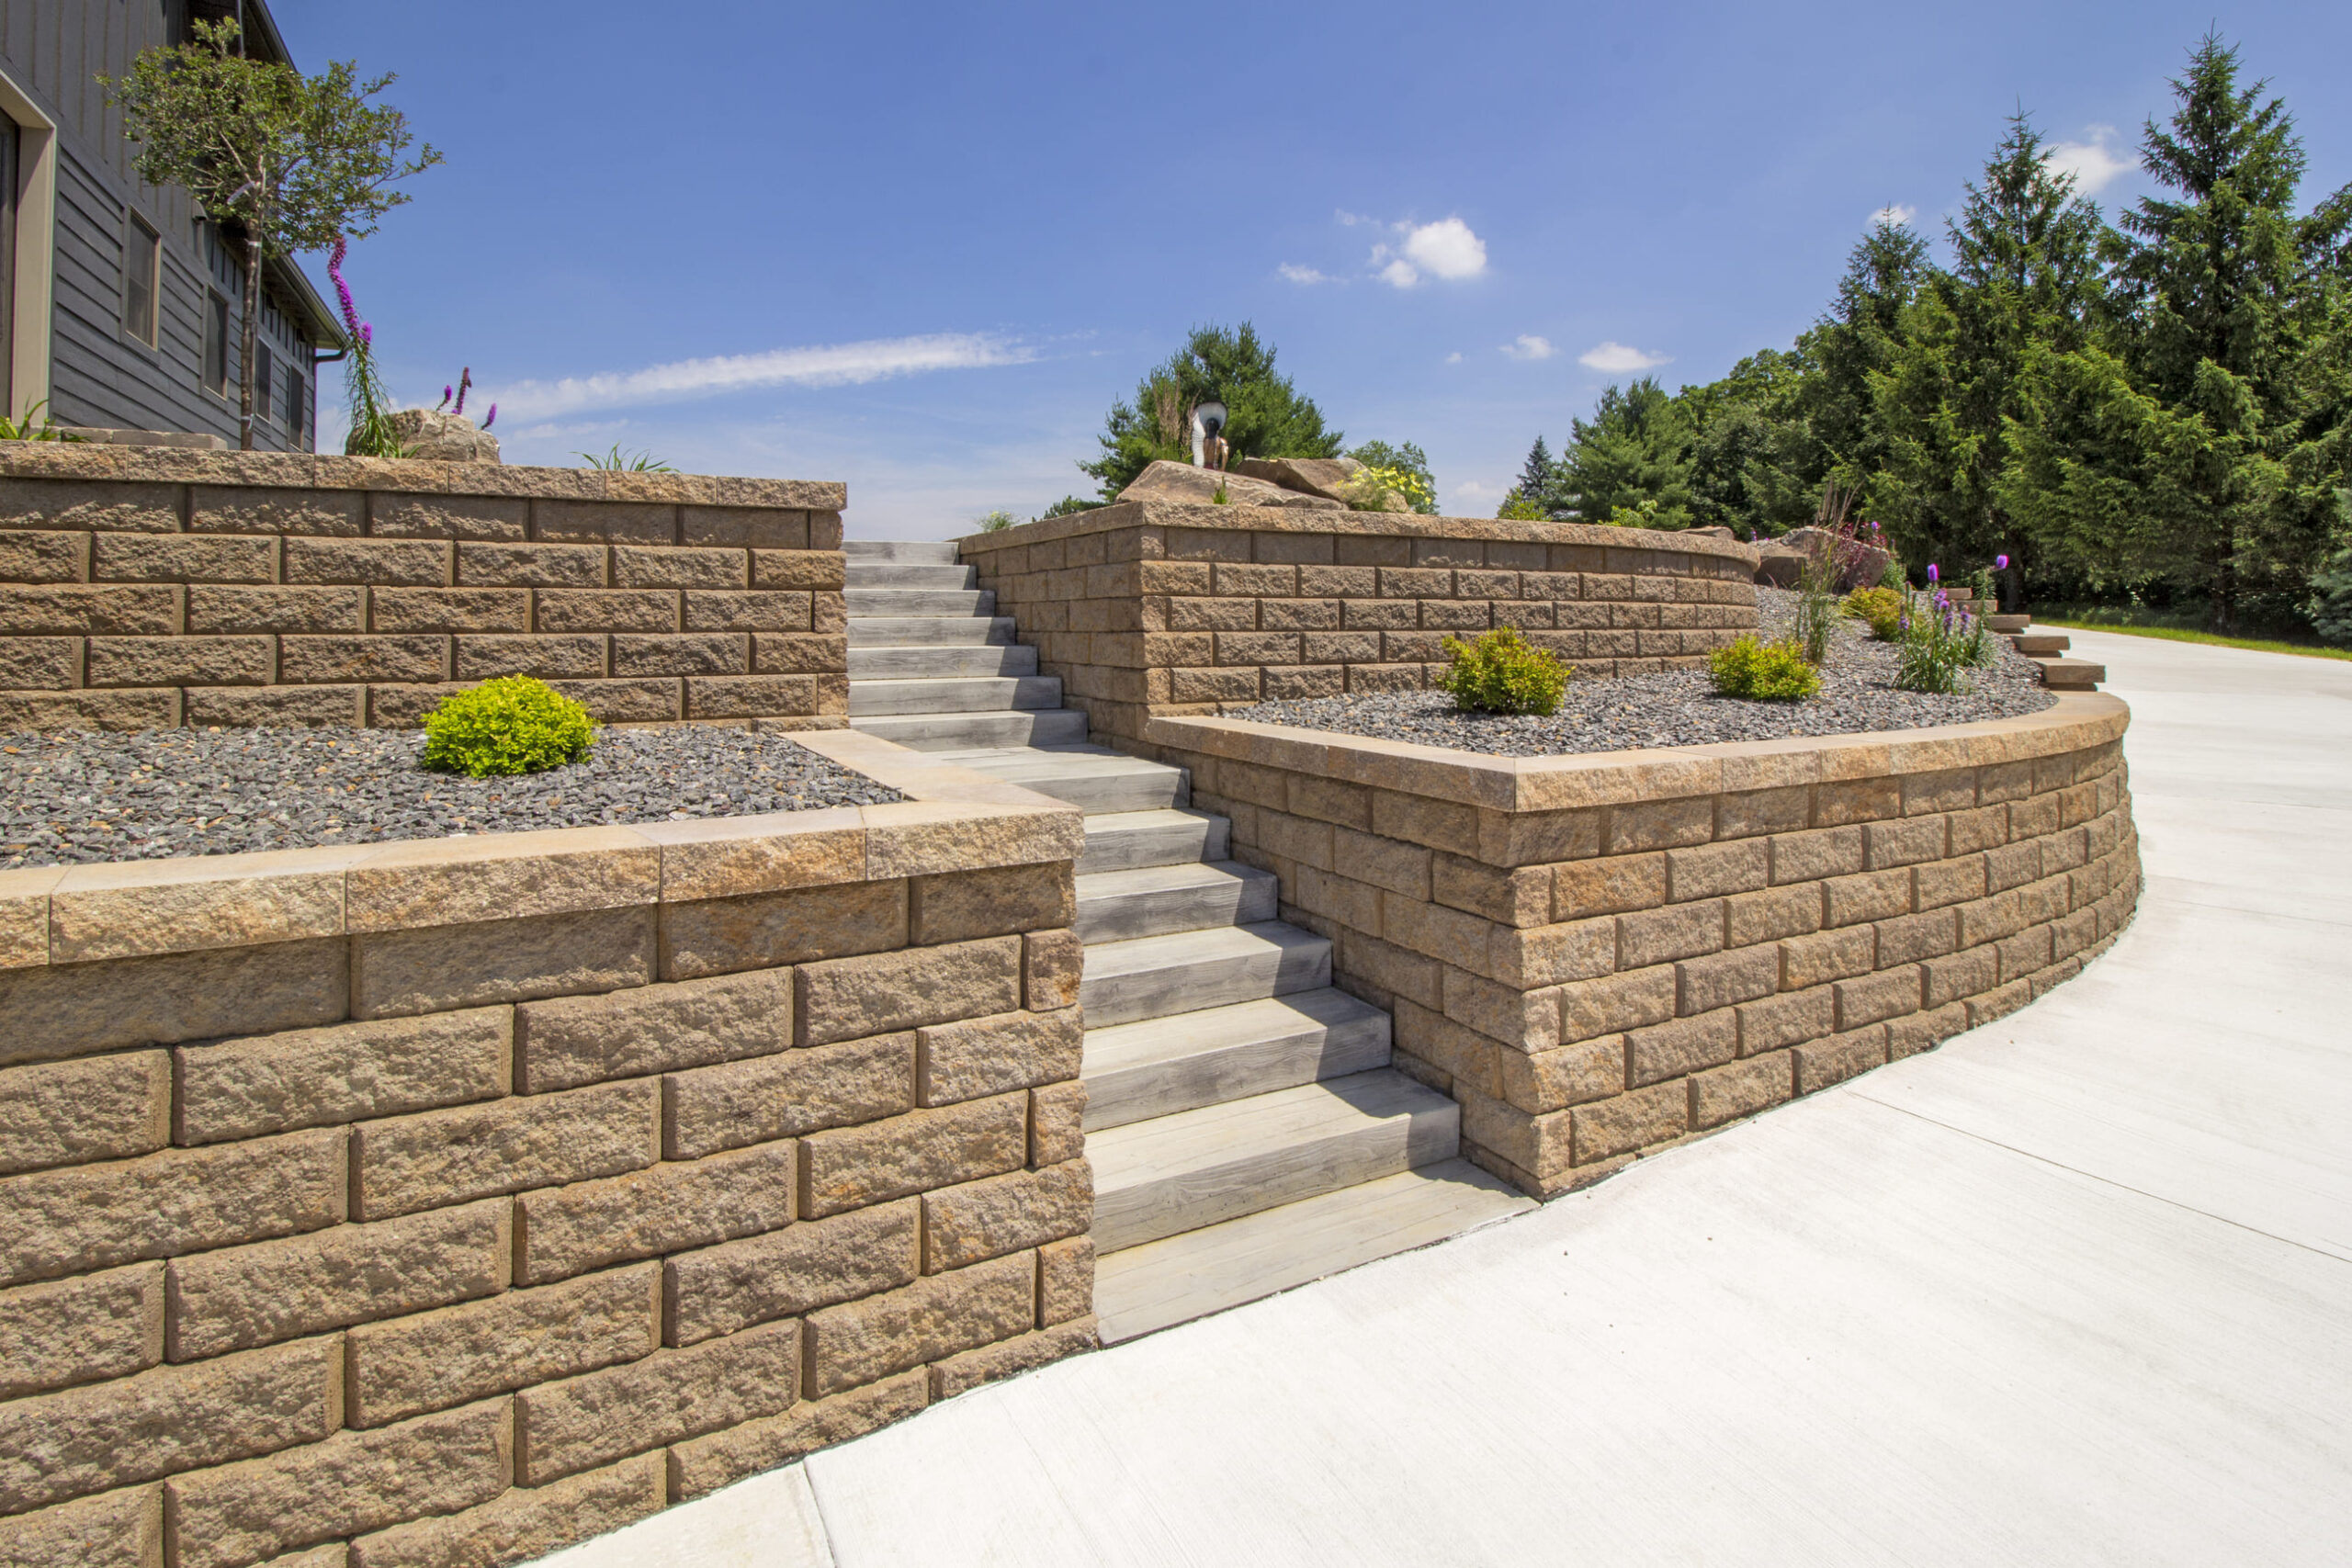
Special Considerations When Using Caps as Steps
When using concrete or stone caps as steps, safety and functionality are paramount.
- Slip-Resistant Surfaces: Choose caps with textured or slip-resistant finishes to prevent accidents, especially in wet areas or near pools.
- Secure Anchoring: Properly anchor each step to maintain stability and prevent movement over time.
- Proper Slope for Drainage: Ensure steps are slightly sloped to allow water runoff, reducing the risk of water buildup that could cause slipping or damage.
Following these considerations ensures that your step installations are both safe and durable.
Press Down to Secure Caps
Firmly pressing caps into place is critical for a strong, stable installation.
- Apply even pressure to confirm the cap adheres well to the adhesive or mortar.
- Check for wobbling or movement to ensure a secure fit.
Correct placement and pressure ensure that your caps and tops integrate seamlessly into your home’s exterior and landscape while maintaining both functionality and aesthetic appeal.
BONUS: Advanced Installation with Stone Veneer FAQs
Can I add stone veneer beneath wall caps for a more finished appearance?
Yes, applying manufactured stone or natural stone veneer beneath your stone caps or concrete caps adds both texture and visual interest. You can install stone veneer on walls made of concrete masonry units or framed with metal studs, making sure the surface is structurally sound and properly prepped.
What’s the correct method to prepare a surface for natural or manufactured stone veneer?
To install either natural stone veneer or manufactured stone, you must first attach metal lath securely over the base, then apply a scratch coat to ensure proper bonding. Once the mortar begins to firm, the veneer pieces can be applied.
Why is a scratch coat necessary before installing stone veneer?
A scratch coat is essential because it creates a rough, textured surface that significantly improves the bond between the substrate and the mortar used to adhere the veneer, reducing the risk of delamination over time.
How do I avoid mess when finishing mortar joints near finished surfaces?
Use a grout bag to apply mortar precisely into mortar joints and head joints. This method minimizes overflow and protects nearby finished surfaces from staining or residue during installation.
Opt for Professional Installation for Best Results
For optimal results, hiring professionals for concrete or stone cap installation is highly recommended. While DIY projects can be rewarding, professional installers bring the precision, experience, and specialized tools needed to ensure long-lasting, high-quality results.
- Expertise Matters – Professionals understand the structural requirements of retaining walls, pillars, and other masonry surfaces, reducing the risk of errors that could lead to costly repairs.
- Compliance to Building Codes – In addition to ensuring the entire job is done according to proper installation procedures, professionals also comply with both local and national building codes, including nuanced local building code requirements that DIY installers may overlook.
- Efficient Installation – Specialized tools and techniques allow for precise placement, alignment, and finishing touches.
- Peace of Mind – Professional installation ensures a durable, visually appealing outcome that enhances the overall value and longevity of your property.
Working with experts, such as the team at Rochester Concrete Products, guarantees that your concrete or stone caps and tops are installed securely, look polished, and stand the test of time.
Choosing professional installation is an investment in both beauty and structural integrity.