On every segmental retaining wall, whether made from poured concrete or concrete blocks, you feel the same tension: everyone will judge the face, but the real verdict shows up a few winters later, after the soil moves and the water freezes. A wall that looked perfect on day one can start bulging, cracking, or shifting because of decisions you made in the trench, not in the top course.
At its simplest, retaining wall base preparation means building a stable, well-drained foundation beneath the wall: competent subgrade, a properly constructed SRW leveling pad, adequate embedment, and controlled compaction.
But those pieces do not work in isolation. Footing depth, soil conditions, drainage, frost exposure, wall height, reinforcement, and site loading all influence what the base actually needs to look like.
Getting the base right means looking at more than trench depth alone. The sections ahead break down how subgrade, embedment, leveling-pad geometry, aggregate, drainage, compaction, reinforcement, and site conditions work together, and where those requirements can change from one retaining wall to the next.
When Segmental Retaining Wall Problems Start at the Base
Many visible problems in segmental concrete block retaining walls can be traced back to the base: maybe it’s shallow, uneven, poorly compacted, or inadequately drained.
Proper drainage, foundation soil type, and reinforcement are critical in preventing issues caused by surcharge loads, wall geometry, and construction practices. Thus, the base course should be evaluated as part of the complete retaining wall system.
Problems start when the base fails at two key tasks: to spread the retained load, or stress, into firm soil and to permit water flow.
That’s when the retaining wall blocks can start to move. This becomes evident in the long term, even before it’s initially noticeable with cracks.
Drainage problems may also escalate hydrostatic pressure, contributing to water-related issues.
Common base-related symptoms include:
- Bulging “bellies” in one band of the wall instead of an even lean
- Toe kick-out where the bottom course creeps forward, causing coping units and the face to tip
- Settlement or cracking in pavements or steps connected to the wall near the bottom
- Soil erosion might expose or undermine sections, disrupting uniform support
Soft spots, organic soils, poorly compacted backfill, or undermined sections can further complicate matters. Water exacerbates the problem: if fines wash out during storms or freeze-thaw cycles, small voids can evolve into visible movement.
A quick inspection with a straightedge, level, and tape can reveal how out-of-alignment the face is and how much settlement has occurred. These checks help distinguish cosmetic aging from serious structural issues that require engineering evaluation.
What Really Lives Under an SRW Base: Subgrade, Stone, Leveling Pad, and Embedment
Under a segmental retaining wall, the “footing” is better understood as a small system of layers that share two jobs: carry load and manage water.
Most modern SRW manuals and manufacturer guides, including systems from Rochester Concrete Products, are built around the same general base-zone principles, even though details vary from system to system.
Think of it like this:
- Subgrade: native soil or engineered fill, stripped of topsoil and organic material, corrected where it’s soft, and compacted to provide uniform support.
- Leveling pad: the compacted aggregate base that provides a firm, level bearing surface for the first course. Crushed gravel is the most common material, but some engineered systems may permit other leveling-pad materials.
- Embedment: the portion of the bottom course buried below finished grade to resist sliding, erosion, and loss of support at the toe.
- Drainage zone: free-draining aggregate and, where required, drain pipe that provides water with a controlled route away from the wall.
SRWs rely on the interaction between the wall units, base, soil, reinforcement, and drainage system. They do not behave like a rigid beam on a conventional deep concrete footing.
That’s why continuous, uniform support under the first course matters more than the compressive strength of any single material.
For Rochester Concrete Products Classic wall systems, current installation guidance uses a 6-inch compacted angular aggregate leveling pad. Other RCP wall systems may have different requirements, so always confirm the required base detail in the current installation manual for the specific system being installed.
Retaining Wall Footing Depth: How Deep Should an SRW Base Be in Frost-Prone Soils?
For an SRW, retaining wall footing depth is really a question of how deeply the leveling pad and first course should be excavated and embedded.
In frost-prone soils, most SRW bases do not automatically need to sit at full building-footing frost depth. They need competent supporting soil, adequate embedment, and drainage that limits uneven movement in saturated, frost-sensitive soils.
Typical SRW design guidance treats footing depth, embedment, drainage, and soil improvement as a package rather than relying on a single deep concrete footing.
For Rochester Concrete Products Classic wall systems, installation instructions call for a minimum of 6 inches of block embedment or approximately 10% of wall height, with additional embedment where wall height, slopes, poor foundation soils, or other site conditions require it. The leveling pad itself is typically another 6 inches of compacted angular aggregate beneath the base course.
Treat those dimensions as system-specific guidance. Well-drained granular bases and backfill reduce frost-related risk by limiting the water available to freeze and expand beneath the wall.
Site Conditions Can Require More Excavation
Short gravity walls retaining gentle slopes may be able to rely on modest embedment plus good drainage. Taller reinforced walls, walls near driveways or parking, and tiered systems often need deeper excavation so the leveling pad and reinforced zone extend into stable ground.
Conditions that can change the required excavation or embedment include:
- Wall height and retained slope
- Driveways, parking areas, structures, or other surcharges
- Weak, disturbed, or frost-sensitive foundation soils
- Tiered or reinforced wall configurations
- Erosion risk at the toe
- Cuts, ditches, or changing grades near the wall
A wall can also lose effective embedment if soil erodes at the toe or the supporting soil proves less stable than expected.
Treat local frost depth as a design consideration, not a universal excavation number. Where wall height, loading, slopes, soils, or site conditions increase risk, confirm the required embedment with the applicable manufacturer guidance and a qualified engineer or local SRW professional.
If you’re hiring a contractor, look for a clear explanation of where the wall base will bear relative to finished grade, frost conditions, and competent soil, along with how drainage will be managed below and behind the wall. The answer should reflect the wall system and site conditions, not a one-size-fits-all trench detail.
Getting the SRW Leveling Pad Width, Stone, and Drainage Right
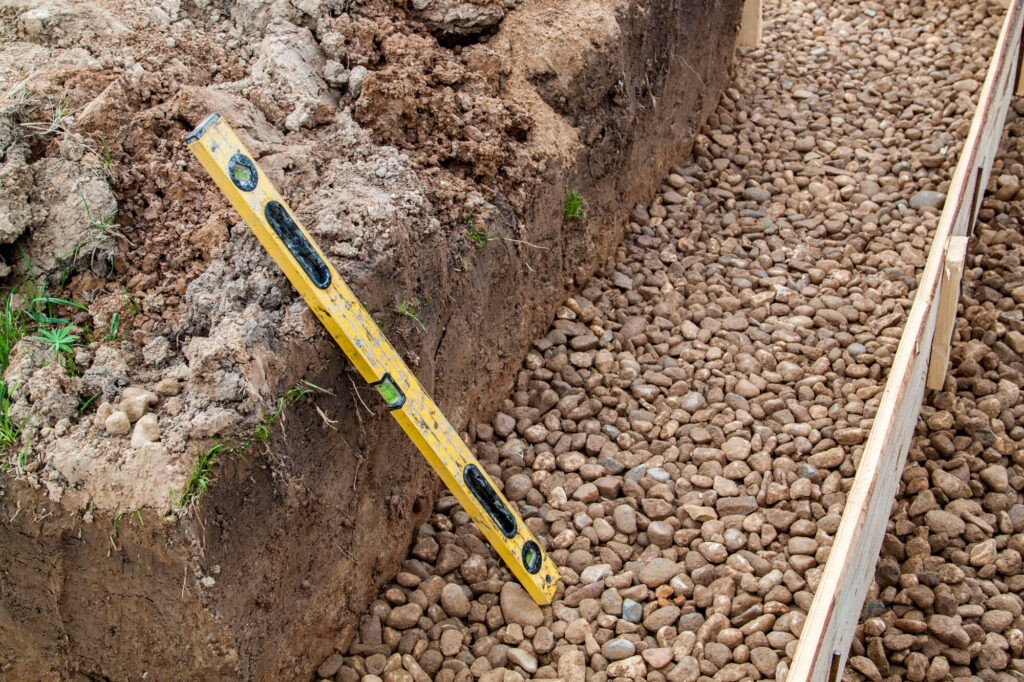
Once depth is set, the leveling pad has to be wide and stiff enough to act as both the bearing surface and working platform, built from aggregate that carries load without trapping water.
For many small to mid-height walls, a good starting detail is:
- Thickness: about 6 inches of compacted angular aggregate, or what the specific wall system requires.
- Width: wide enough to extend beyond both the front and back of the wall units, based on the selected system and installation detail.
For Rochester Concrete Products Classic wall systems, follow the current installation detail for the required pad width, thickness, and aggregate.
For material, think angular, compactable crushed stone or gravel aggregate, not rounded pea gravel. Here’s a simple comparison to keep in mind:
| Aggregate Type | Load Support & Interlock | Main Risks |
| Angular crushed gravel or stone | Locks under compaction; strong base support | Performs well when properly graded and compacted |
| Rounded pea gravel | Limited interlock beneath concentrated loads | Can shift or roll if used where a compactable base is required |
| Unprocessed bank-run gravel | Inconsistent gradation and fines content | May retain water or compact unevenly |
Avoid using rounded pea gravel directly beneath the wall when the system requires compactable angular aggregate. Rounded stone may have a place in a designed drainage zone, but it should not automatically replace the specified leveling-pad material.
Think of the pad as the flat, compacted “shelf” under the blocks. Directly behind it, the drainage aggregate and any specified drainage pipe (which will likely be a perforated pipe) give water a controlled path toward an appropriate outlet.
Keep the leveling pad at the elevation and geometry required by the wall design, but manage water flow through the specified drainage aggregate, drain pipe, surface grading, and outlets rather than intentionally pitching the bearing surface.
If you’re reviewing a bid, look for a clear explanation of the aggregate specified beneath the wall, the material behind it, and how both align with the manufacturer’s installation detail.
That tells you whether the installer is treating structure and drainage as part of the same system.
Step-by-Step Base Excavation, Preparation, and Compaction That Actually Lasts
Long-lasting SRW bases come from a simple sequence done consistently and an essential part of foundation preparation. That sequence matters more than any single “magic” material or shortcut.
A robust field sequence looks like this:
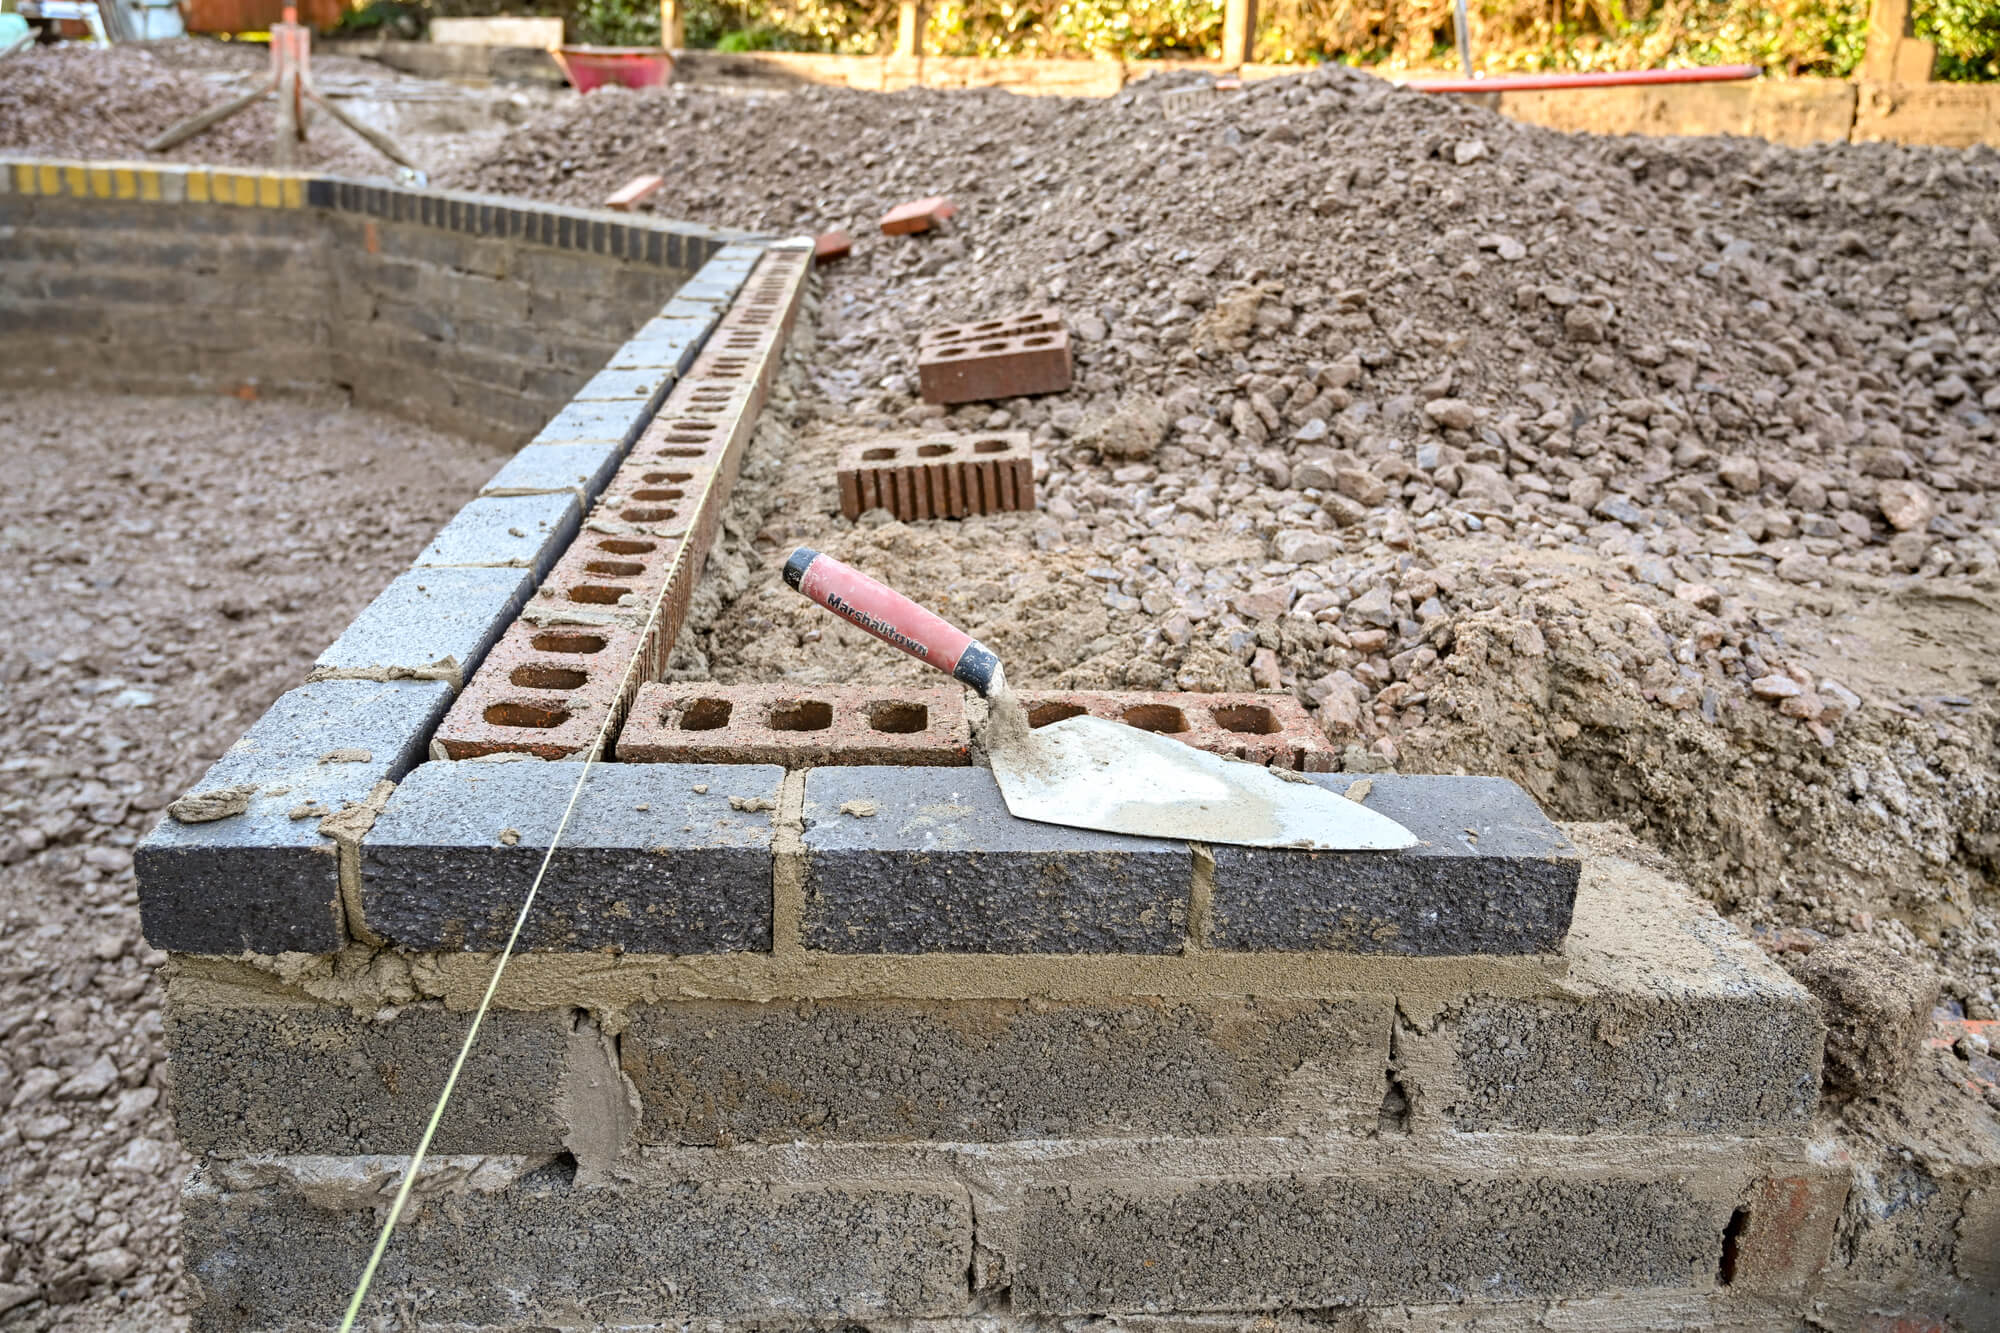
- Lay out and excavate the trench: Excavate wide enough for the leveling pad, drainage stone, any required reinforcement, and safe working room. Follow applicable excavation-safety requirements.
- Strip and correct the subgrade: Remove surface vegetation, topsoil, roots, organics, and unsuitable material. Probe or proof-roll where appropriate, and undercut soft or pumping areas before replacing them with suitable compacted structural fill.
- Place the leveling-pad aggregate in controlled lifts: Use the aggregate required by the selected wall system, and keep lift thickness appropriate for the material and compaction equipment.
- Compact to the specified density: Engineered SRW specifications commonly use benchmarks such as 95% of Standard Proctor density in reinforced soil zones, but the project specifications, geotechnical recommendations, engineering, and manufacturer requirements should control.
- Match the compactor to the work area: Use equipment capable of achieving the required density without disturbing the wall units, damaging reinforcement, or leaving poorly compacted zones. Plate compactors are the standard, but other check product guidelines.
- Verify the base before setting block: Check elevation, level, width, thickness, and any required drainage components before the first course goes down. Correcting a base problem at this stage is far easier than correcting it after the wall starts to rise.
A few photos of the exposed subgrade, measured base thickness, and any required density-test records can provide useful documentation if questions come up later and help contractors maintain a consistent base standard across crews and projects.
How the Base, Geogrid, and Reinforced Soil Work Together
On reinforced segmental retaining walls, the base, geogrid, reinforced soil zone, drainage, and wall units act as one system, so your base preparation has to match the grid layout and the type of backfill specified for the project.
Get Geogrid Ready
The geogrid layers usually start within the lower courses above the leveling pad, then extend back into properly compacted reinforced fill according to the wall design. That core filling needs to meet the project requirements so the geogrid mesh can develop the required interaction with the soil instead of relying on soft, wet, or unsuitable material.
Align Base with Grid Reinforcement
When you step the base, the wall geometry and reinforcement or geogrid layout should step with it according to the design. That keeps embedment and reinforcement working together instead of creating short or weak zones.
Excavate As Much as Needed
Plan enough excavation behind the wall so you can compact the reinforced zone without crowding the face or skipping passes. On tight sites, it is tempting to shorten grid lengths or cut corners on compaction behind the heel, but geogrid length, spacing, strength, and reinforced-zone geometry are design variables, not field adjustments to make casually.
If the wall is tall, loaded, tiered, or otherwise complex, rely on the manufacturer’s design criteria and project-specific engineering to confirm grid spacing and lengths before you dig.
Setting the First Course So Line, Grade, and Drainage Stay True
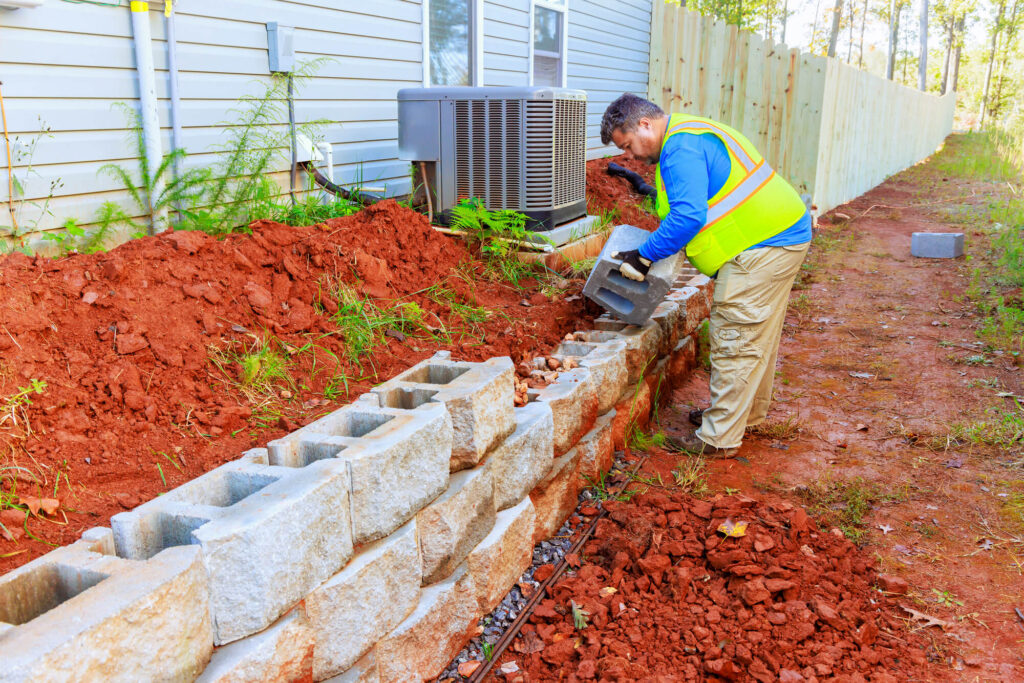
If the first course of an SRW is crooked or under-buried, every course above will magnify that error, and the wall can lose required embedment and drainage relationships. Locking this row in correctly is your last simple chance to keep line, grade, and water control on track, and it is much easier to fix now than after you have several tons of concrete block on the wall.
Manufacturer installation guides emphasize this step because first-course errors become harder to correct as the wall rises.
Set the First Course in a Controlled Sequence
Work through the first course in this order:
- Establish alignment and elevation: Pull stringlines and set reliable elevation controls using offset stakes or pins so your reference points stay undisturbed.
- Fine-grade the leveling pad: Use a rigid straightedge and check along and across the wall so small humps or dips do not telegraph into the first course.
- Start at the lowest point: Step the trench and courses upward with the required grade so the required embedment stays consistent instead of letting the base “daylight” out of the slope.
- Make corrections with approved methods: Use the adjustment method allowed by the selected wall system rather than improvised piles of loose material that can compress or wash away.
- Install drainage as detailed: Place drainage aggregate and any specified perforated drain pipe where the wall detail requires it, isolate the system from fines where needed, and provide a real discharge path.
- Verify before stacking: Walk the first course with a level, stringline, and tape, confirm embedment and elevation, and make corrections before adding more courses.
Every course you add multiplies whatever you leave in that bottom row.
When a Segmental Retaining Wall Becomes an Engineered Structural System
Above a certain combination of height, loading, soil conditions, slopes, and consequence of failure, a segmental retaining wall stops being “just landscaping” and requires project-specific structural evaluation.
Height Is Only One Part of the Engineering Decision
Many jurisdictions use wall-height thresholds around 4 feet, but the exact trigger depends on local code, how wall height is measured, and whether the wall supports driveways, slopes, buildings, or other surcharges. Engineering can be required at lower heights when site conditions increase risk.
A simple one-page base checklist, aligned with engineered SRW designs and manufacturer installation guides, should at least cover:
- Required base and embedment depths for the wall height, soils, and frost conditions
- Approved aggregate types and gradations for base and drainage
- Target compaction levels and maximum lift thicknesses
- Drain locations, outlet expectations, and any filter or separation requirements
- Required geogrid strengths, lengths, spacing, and embedment zones
A qualified SRW dealer, installer, or engineer should be able to show how the base and drainage detail aligns with the wall manufacturer’s requirements, local code, and any project-specific engineering. That helps confirm the wall is being built for the selected system and site conditions, not from a generic detail.
For contractors, proper excavation, aggregate, drainage, and compaction cost far less than tear-outs, disputes, and callbacks. Base preparation is not the place to cut corners.
Rochester Concrete Products treats retaining walls as complete systems. The wall unit matters, but so do foundation conditions, embedment, drainage, reinforcement, and installation details. Start with the right RCP wall system and its current technical guidance before material reaches the trench.
Make Your Retaining Wall Base the Strongest Decision You Make
The decisions made below grade determine how well the finished wall handles changing soils, water, frost, and load over time. Define the retaining wall footing depth, SRW leveling pad, embedment, aggregate, drainage, and compaction before construction begins rather than solving them course by course in the field.
Rochester Concrete Products offers retaining wall systems for a range of residential, commercial, and engineered applications, backed by installation guidance and technical resources that help contractors, dealers, designers, and homeowners connect the product to the conditions on the site.
Before construction, review the technical information for your selected RCP retaining wall system along with RCP’s SRW Best Practices guide. For conditions beyond the standard detail, contact an RCP representative, a knowledgeable RCP dealer or qualified installer, or a professional engineer as appropriate for the wall, loading, soils, and site conditions.