If you’ve ever watched a sloped patio settle, separate, or send water back toward the house, you already know this isn’t the same as laying pavers on flat ground. On a hillside property, gravity, water, and freeze–thaw cycles are always working against your project. If the base, slope, and drainage are treated like an afterthought, that hill will win.
On a sloped surface, your job is to turn that grade into a complete pavement and drainage system that feels solid underfoot and behaves predictably in heavy rain and winter.
Choosing the right concrete pavers or outdoor porcelain pavers for a sloped lot starts with understanding how the slope, soil, base, edge restraint, and drainage plan will work together.
While this guide shows you how to read and measure your slope, learn the correct installation sequence, set realistic elevations, and highlight the importance of a base that won’t creep and proper drainage, our paver installation guide in our resource library can help you with further installation details.
By the end, you’ll know how to diagnose your site, choose safe slope ranges, engineer a stable base, and decide when it makes sense to bring in help.
Why Sloped Sites Break Most Paver Projects: And How To Think Differently
Most sloped paver projects fail because they copy flat-yard patio details and ignore drainage systems.
Frequently, you’ll see the following three main mistakes during the installation process:
- The base preparation is too thin
- Slope calculation is imprecise
- Water flow is left to find its own path.
On a hillside property or sloped outdoor living space, just one of those mistakes will almost always mean erosion, settling, and loose edges.
Treating a sloped patio, walkway, terrace, or outdoor kitchen as a full system that incorporates structure, soil stability, and drainage slopes puts you in the same mindset as experienced installers and manufacturers.
A successful paver slope installation relies on a cohesive approach that includes proper excavation, edge restraint, the correct joint material, and base layers using materials such as gravel base or geotextile fabric.
A few mindset shifts make a big difference in overall stability:
- See the sloped surface as a predictable force; water will always chase the easiest path downhill, potentially increasing hydrostatic pressure if not managed correctly.
- Separate a comfortable slope underfoot from the critical drainage slope that efficiently directs water away, potentially using methods like the French drain system.
- Expect landings, steps, and small terraces on steeper grades; they are standard practice in slope engineering to manage soil conditions and facilitate proper drainage.
Once you start thinking in terms of systems instead of surfaces, decisions about layout, base preparation, paver edging options, and drainage become much simpler to justify and defend, leading to a more stable and lasting installation.
Before You Begin: Codes, Product Guides, and Site Conditions
Before starting any paver slope installation, check local building codes, site-specific engineering requirements, and the installation instructions for the Rochester Concrete Products paver, wall, edging, or drainage system you choose.
Sloped sites may have stairs, retaining walls, concentrated runoff, frost movement, and structural loads.
You should follow product guidance and local code requirements instead of general rules of thumb.
Diagnosing Your Slope: The First Step
You can’t design a safe sloped paver installation until you know how steep the ground really is.
Measurement
Start by measuring rise and run between key points like door thresholds, planned patio edges, driveways, and obvious low spots.
A string line, tape, and level will tell you how many inches the ground falls over a known distance, allowing for accurate slope calculation.
This will help you decide whether you’re dealing with a gentle yard or a true hillside that needs steps or terraces, which will affect your slope stability.
Drainage Site Assessment
Next, let the site show you how it already handles water. After a good rain, walk the area and notice:
- Where water first starts to collect or cut small channels, affecting potential drainage systems.
- Where it speeds up and concentrates as it moves downhill, possibly necessitating a French drain system or other drainage solutions.
- Where it slows down and sits in soft, muddy patches, which might require improved soil conditions or a gravel base for stability.
- How different soils respond. For example, tight clay staying soggy versus sand or gravel draining quickly.
Risk Zones
Finally, mark “risk zones” around anything that doesn’t like movement or extra water:
- Foundations
- Retaining walls
- Property lines
- Existing leaning walls
- Cracked slabs
These areas may require additional edge restraint or other stabilization measures.
A simple sketch with slopes, wet spots, and sensitive structures gives you a realistic picture of what your paver system has to solve, factoring in the need for potential geotechnical analysis, before you ever touch a shovel.

Designing Layout, Elevations, Slope Ranges, and Drainage
On sloped ground, successful paver installation starts with deciding which surfaces must feel nearly level and which can follow the grade.
It’s crucial to assign each a safe slope range and establish a proper drainage path.
For optimal slope ranges, consider the following:
| Use | Typical Slope Range | Notes |
| Patio / outdoor room | about 1–2% | Feels close to level under chairs, requires well-designed drainage systems |
| Primary walkway | about 1–4% | Safe, comfortable daily circulation, with attention to soil stability and drainage |
| Secondary / utility path | about 2–5% | Steeper grades are possible if surface materials have good grip, such as permeable pavers |
| Driveway / parking | about 2–5% | Supports drainage without compromising traction, with a solid gravel base |
Translate these percentage values into specific spot elevations using tools like a total station or laser level. Then, mark finished heights at doors, landings, and key edges, then work backward with string lines or laser to set grades.
Around the house, maintain a stronger initial pitch away from the foundation, then ease into gentler patio slopes.
For longer expanses, consider one continuous slope versus options that incorporate a landing, switchback, or small terrace; often the segmented version enhances slope stability, improves drainage, and ensures user comfort over time.
Integrating materials like geotextile fabric and establishing adequate edge restraint options, such as plastic paver edging or poured concrete edge beams, further reinforces the pavers’ stability.
Remember: Proper excavation and base preparation, including compacting the gravel base, are crucial steps, especially in hillside properties with complex soil conditions and when dealing with potential hydrostatic pressure.
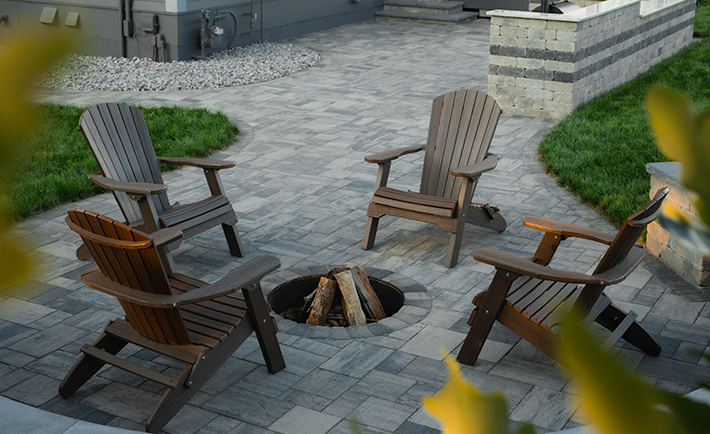
Choosing the Right Pavers for a Sloped Yard
Selecting the right pavers for a sloped yard involves more than just aesthetic considerations.
Key factors such as:
- Surface texture
- Paver thickness
- Laying pattern
- Edge restraints
- Bedding material
- Drainage compatibility
all matter more when the pavement is built on grade.
Pedestrian Concrete Paver Projects
For patios, outdoor kitchens, or a walkway of pavers, it is important to select pavers or slabs that:
- Are suited to the area’s intended use
- Offer adequate traction
- Can be installed with the appropriate base preparation for the project.
And in areas with steeper slopes, such as walkway transitions to steps or driveways exposed to snow and ice, emphasis should be placed on paver systems that coordinate well with strong edge restraints, compacted gravel bases, and interlocking patterns to ensure stability.
Consider using concrete pavers for their durability and ability to manage water flow effectively, thereby reducing puddles and maintaining proper drainage on sloped surfaces.
Rochester Concrete Products provides a wide array of paving options, including pavers, slabs, and permeable pavers that, when used with appropriate drainage systems and edge restraints, can address the challenges presented by varying slope and drainage conditions.
Among the top-rated concrete pavers with good traction, drainage, and stability are:
- Cobble Stone™: With a textured surface and irregular edges, Cobble Stone recreates the look of a centuries-old European boulevard. The open joint design makes it ideal for eco-friendly, permeable applications.
- Holland Eco™ Paver: Designed specifically as a high-flow-rate eco-friendly paver. Holland-Eco is ideal for commercial and heavy vehicular applications. Palletized for machine installation.
- Pacific-Eco™: Designed specifically as a high-flow-rate eco-permeable paver. Pacific-Eco is ideal for commercial and heavy vehicular applications. Palletized for machine installation.
- Mezzano™: Mezzano comes as a mid-sized three-piece system and features an embossed slate texture surface. Its versatile design makes it ideal for patios, pathways, pool decks, or driveways.
- Cheyenne™: A three-piece, larger format paver featuring an embossed slate texture surface. Cheyenne installs quickly and is ideal for patios and pool decks.
- Colonial™: These popular pavers look like the decades-worn cobbles of colonial streets. Colonial is a popular choice for patios, paths, pool decks, and driveway applications.
- Bullnose Paver: Bullnose pavers are ideal for complementing edging step treads, pool coping, seatwall caps, and accents.
- Antique Travertine™: Offering the timeless appeal of ancient natural stone, Antique Travertine Tiles are perfect for patios, walkways, and pool decks. They create a sophisticated, old-world charm that enhances the elegance of any outdoor space.
These solutions enhance the stability and longevity of your hardscape installations.
Engineering the Base on a Slope
A sloped paver surface is only as stable as the base under it. On a hill, you usually need a deeper, better-locked base than you would use on flat ground.
Determining How Deep to Go
For light-use patios and walks, many installers start with 4–6 inches of compacted dense-graded aggregate over firm subgrade; for driveways and vehicle areas, 8–12 inches or more is common, especially on weak soils or steeper grades.
The steeper the slope and the softer the soil, the more base you generally need to resist movement.
As a starting point, many pros think in these ranges:
- Patios and light-use walks – about 4–6 inches of compacted base.
- Heavier walks and small drives on good soil – about 6–8 inches.
- Driveways, vehicle pads, weak soils, or steeper grades – about 8–12+ inches.
- High-load or problem areas – extra depth and, in some cases, a reinforcing grid.
Use those as rules of thumb, then match your plan to the guidance for the specific paver and base system you choose. It’s crucial to always match the base assembly, compaction method, joint material, edging, and drainage approach to the specific product guide and site conditions.
How Much Geotextile to Use
On clay, fill, or wet ground, a layer of geotextile fabric between soil and base helps keep fine particles from pumping up into the stone and weakening it.
On steeper or heavily loaded sections, one or more layers of geogrid inside the base can add shear resistance, helping the stone lock together and resist sliding.
None of these tools replaces proper grading and compaction, but they give the system more margin when gravity and water are trying to pull it apart.
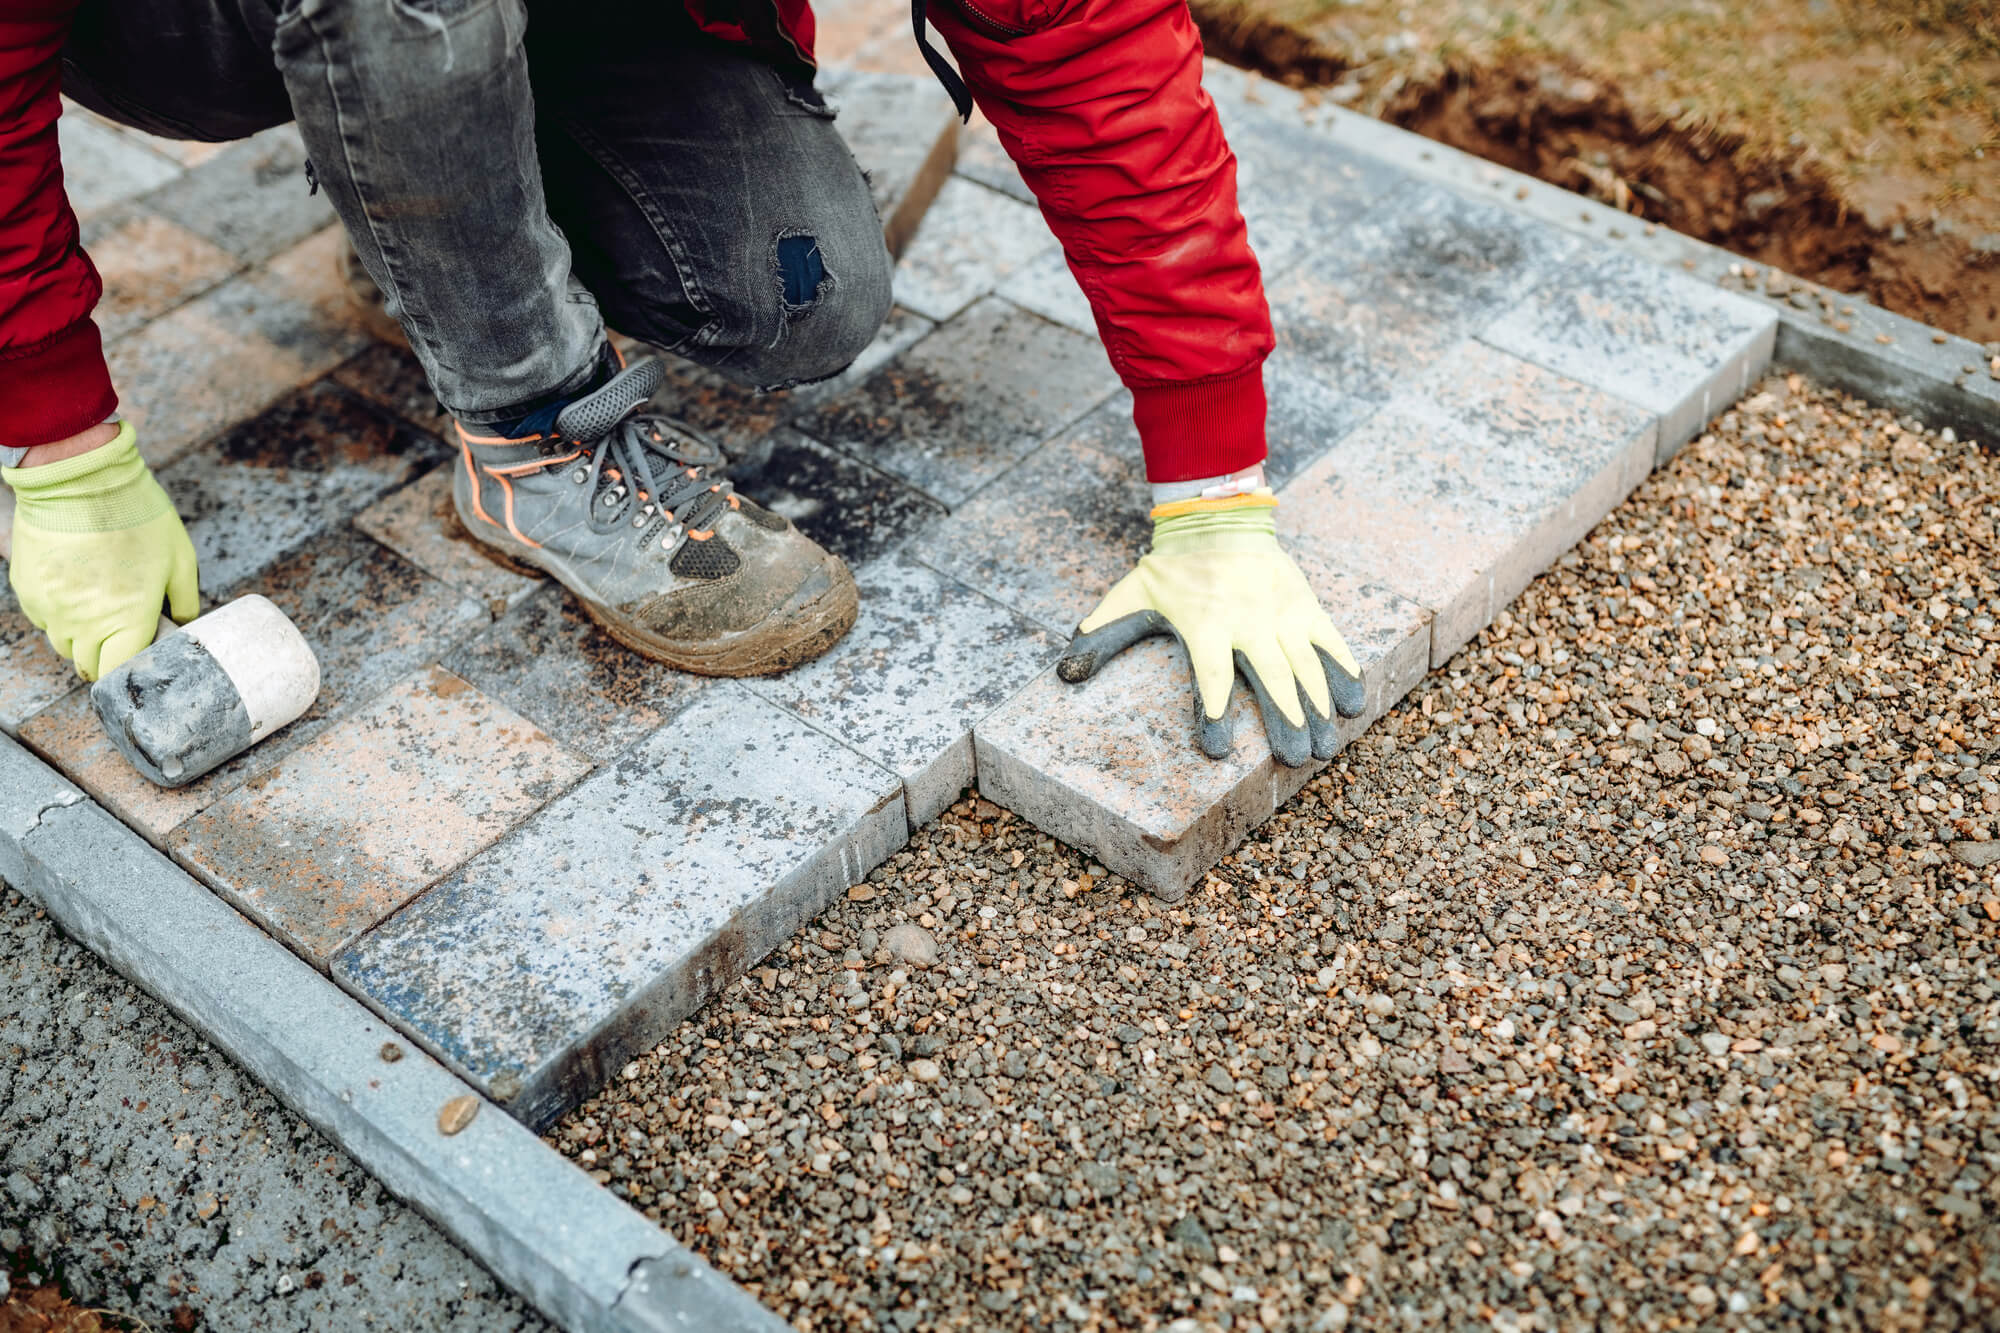
Grading, Excavation and Lift-by-Lift Compaction on Uneven Ground
Grading a slope for pavers is about creating a uniform, stable platform, not just shaving high spots. Instead of cutting one long plane out of the hill and ending up with a thin base at the low edge, it often works better to cut in shallow benches or steps, so your base thickness stays consistent from side to side.
For example, that may mean turning one long 3-foot rise into two shorter tiers separated by a small step or retaining wall.
In cases such as those, you can follow a basic sequence:
- Excavate to your target depth
- Compact the exposed subgrade before you add any base
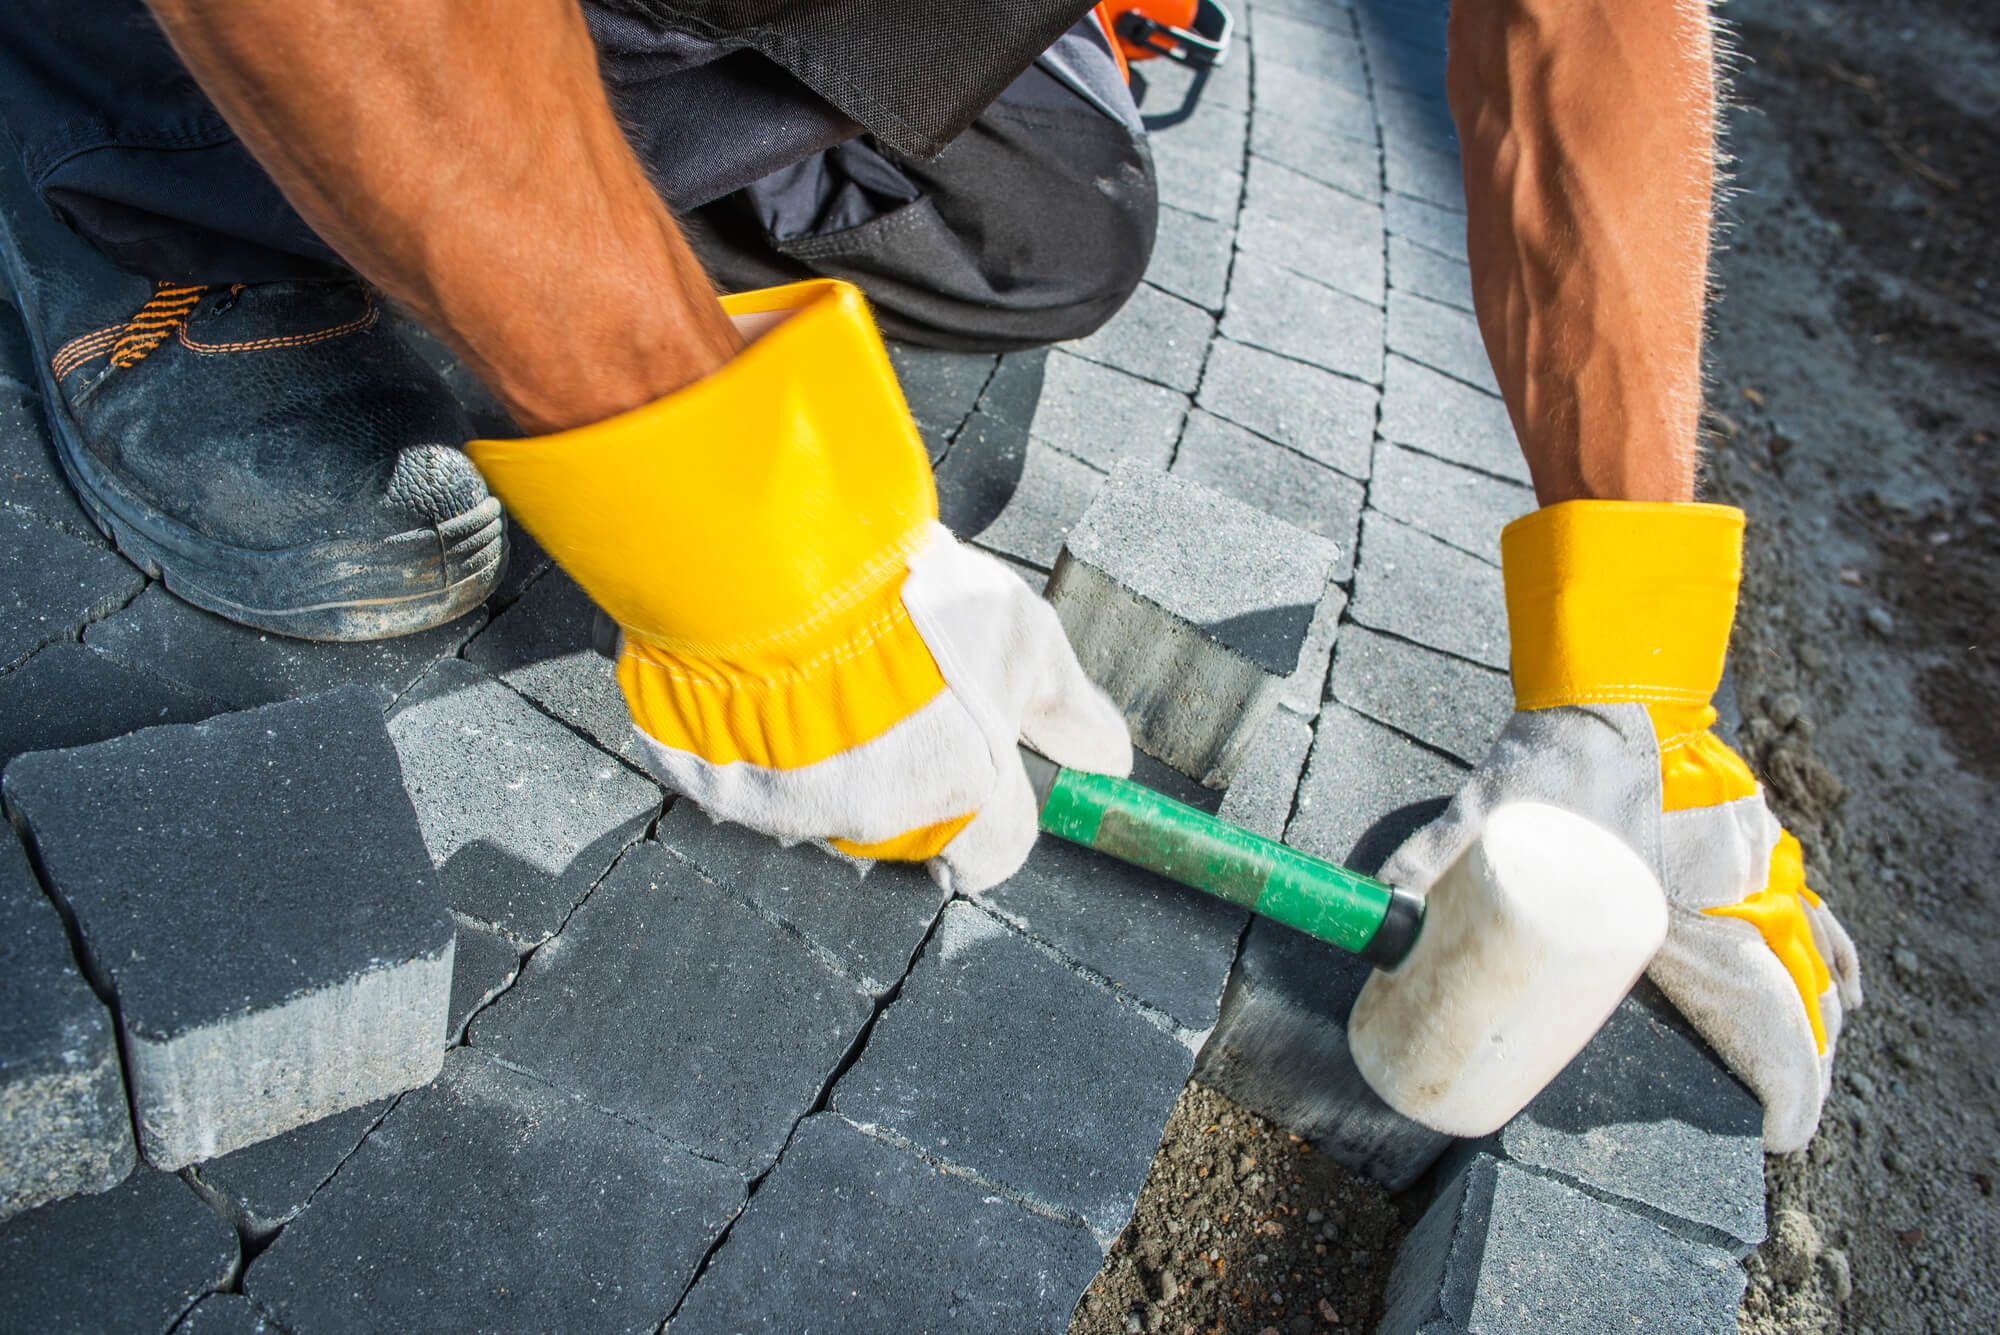
- Place gravel bed or gravel base in thin lifts, often 3–6 inches at a time, and compact each layer thoroughly before adding the next.
- On steeper slopes, work the compactor up and across the grade in controlled passes and avoid operating on anything that feels unstable underfoot.
- Use string lines, stakes, or a laser set to finished elevations minus paver and bedding thickness.
As you build, check that the base follows the intended slope in both directions. Pay extra attention to the steepest runs, curves, and transitions, because that is where movement shows up first.
Pro tip: Keep stockpiles and equipment off finished areas and route machines around major tree roots or soft spots so you are not building surprises into the structure.
Laying Patterns, Edge Restraints, Steps, and Transitions on Slopes
Once the base is right, your laying pattern and edge details decide how well the paved surface resists downhill creep.
Prepare Proper Patterns for Slopes
On slopes, patterns with strong interlock—such as 45- or 90-degree herringbone—spread loads in multiple directions and help the field act as one unit.
Simple running bonds are easier to install, but on steeper grades, they can be more prone to visible movement if the edges aren’t locked in.
Edge Restraints Need to Do Their Job
Edge restraints carry even more weight, literally, on hillside properties than they do on flat work.
- Careful with Plastic Edging: Lightweight plastic edging that survives on a small, level patio can flex or lift over time under gravity and traffic.
- Concrete Edging Secures Best; On slopes, many installers step up to poured concrete curbs, mortared headers, or properly designed segmental wall units and cheek walls that are tied into the base and backfill.
- Steps and Walls Help Relieve Stress: Where you cut into the hillside for a patio or walk, tying steps and small walls structurally into the base helps each tier support the next.
Careful At Transitions
At doors, steps, and driveway transitions, keep riser heights, tread depths, and paver elevations consistent so there are no surprise lips or awkward last steps.
On steeper parts of the layout, consider paver textures and finishes with better slip resistance, especially in regions with snow and ice. Local codes often set maximum riser heights and minimum tread depths, so check those rules early instead of redesigning stairs after the fact.
When Slopes Need Walls, Railings, or Professional Engineering
Some slopes are simply beyond what you should treat as a straightforward DIY paver project.
Once you start cutting into a hill deeply, stacking tall walls, or concentrating loads near a foundation, you are in retaining wall and structural territory.
At that point, good-looking details are not enough; you need to be sure the system can safely hold back soil and manage water for the long haul, and for that, you’ll need a professional slope stability analysis and other more technical assessments.
As rough triggers, consider bringing in a qualified designer, engineer, or experienced installer when:
- Retaining walls approach the height where local codes require engineering or railings.
- You’re placing walls, steps, or heavy pavements close to a house, garage, or pool.
- Soils are clearly weak, wet, or highly variable across a short distance.
Rochester Concrete Products’ segmental wall systems are designed to be part of engineered solutions on slopes, but it still matters how they are detailed and built.
When you see tall walls, complex stair stacks, or tight spaces between structures and grades, treat that as a signal to get professional eyes on the plan before you move dirt.
Drainage Architecture: From Surface Runoff To Subsurface Systems Under Pavers
Good drainage on a slope starts with surface pitch, but rarely ends there.
Short, modest runs might only need about 1–2% fall away from structures to stay dry, but long or steeper stretches usually call for more help.
Pros Use Multiple Drainage Solutions, Not Just One
Many experienced installers break the hardscape into hydraulic segments, using small grade breaks, drains, and swales to collect and redirect water in stages instead of letting everything race to the bottom.
Common tools in a drainage “toolbox” include:
- Surface pitch to move water off the pavers in the right direction.
- Grade breaks and small humps to slow or redirect flow.
- Area or channel drains are set at transitions or low points.
- Swales and shallow ditches to carry water through lawns or planting beds.
- Underdrains within or below the base when soils stay saturated.
Careful Where You Point Your Downspouts
Treat roof downspouts and other point sources as their own design problems. Don’t let them discharge onto or just uphill of your pavers if the flow can undercut the base; route them into swales, rain gardens, or drains sized for local storms.
Subsurface Decisions About Base
Depending on your soils and regulations, you may choose a dense-graded base that sheds water quickly, an open-graded base that stores and infiltrates it, or a hybrid with underdrains.
Whatever you pick, build in an overflow path so that if a drain clogs or a storm exceeds your assumptions, extra water still moves away from the house and your new hardscape.
Common Paver Slope Installation Mistakes to Avoid
Even a well-chosen paver can fail on a slope if the installation details are wrong. Avoid these common mistakes:
- Installing pavers over loose soil without a compacted base.
- Letting the roof downspouts discharge onto or uphill of the paver area.
- Using weak edge restraint where gravity and traffic can push the field downhill.
- Building one long, steep run where steps, landings, or terraces would be safer.
- Ignoring wet clay, fill, or soft soil before base preparation begins.
- Treating retaining walls, stairs, and railings as decorative details instead of structural or code-sensitive elements.
Making The Right Call On DIY vs Professional Help
Your next decision is which parts of a sloped paver installation you want to take on yourself and which are better handed to an experienced crew.
- DIY: Modest grades, small landings, and simple walks may be realistic DIY projects when local codes, product instructions, soil conditions, and drainage requirements are straightforward.
- Go Pro When: Very steep slopes, tall walls, or complex drainage tie-ins are where professional design, compaction equipment, and crew experience can save you from expensive rework.
Plan Your Sloped Paver Project With Rochester Concrete Products
If you’d rather not sort that out alone, connecting with a local Rochester Concrete Products dealer, designer, or installer is a practical next step. Once you understand your slope, soil, and drainage paths, they can help you match specific paver and wall systems to the site and point you toward crews that have already built on grades like yours.
A thoughtful layout, a well-built base, a reliable drainage plan, and careful workers turn a tricky hillside into a solid, dry, comfortable outdoor space. You can trust this space for years.
To plan your paver slope installation, explore Rochester Concrete Products’ pavers, wall systems, steps, edgers, and our very own paver installation guide from our resource library, or connect with a local dealer or installer who understands sloped-site construction.