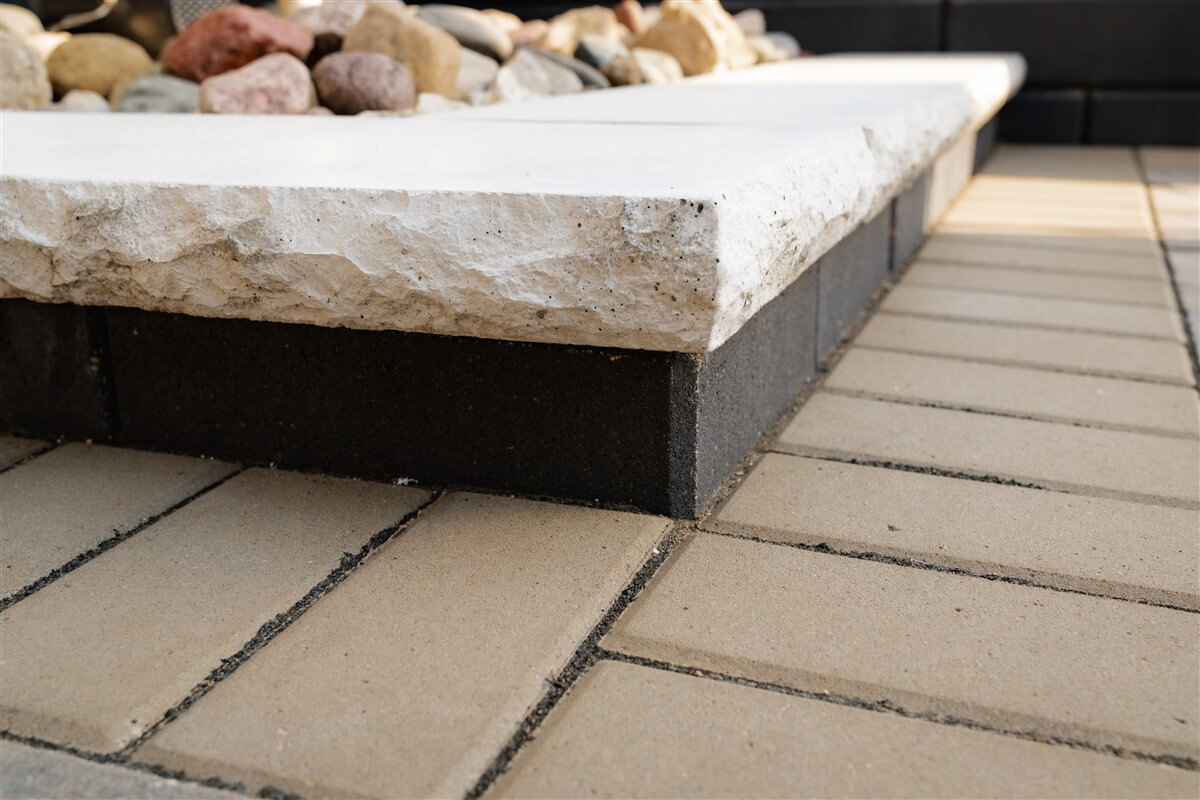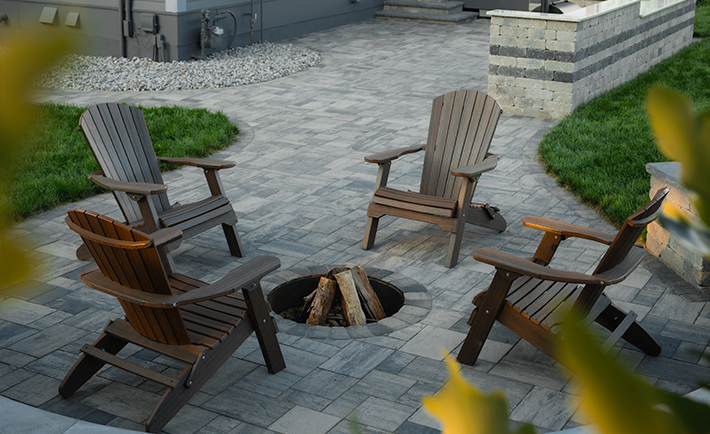
You can build a solid retaining wall and still feel disappointed every time you walk past it if the caps look skimpy, crooked, or start to loosen. The eye naturally goes to the top line, and once a coping detail is wrong, it is hard to ignore.
Getting the details right starts with wall cap sizing, proper overhang, and a compatible attachment method.
This guide explains how to choose retaining wall caps, evaluate a concrete wall coping spec, and select the right adhesive for a professional, long-lasting finish.
How Do You Choose the Right Cap Size for Your Wall Block?
Retaining wall caps do more than finish the top of a wall. They cover exposed block surfaces, help shed surface water when properly detailed, and create a clean, consistent top line.
On seat walls and low terraces, they can also provide a comfortable finished surface when it’s designed for seating. But those benefits depend on choosing a cap that fits the wall system, not just one that looks right.
Wall cap sizing starts with the actual depth and configuration of the wall block, followed by the required overhang, rear alignment, and bearing area. Whenever possible, choose coping designed for a compatible wall system and verify its dimensions before installation.
With Rochester Concrete Products, selecting caps intended for a specific wall family helps simplify sizing while coordinating the wall’s texture, color, and overall aesthetics.
Wall Cap Sizing: What to Measure Before Selecting a Cap
Before you lock in a retaining wall cap, check the following:
- Wall block depth: Measure the actual front-to-back depth of the top course of stone or concrete blocks.
- Cap depth: Confirm adequate coverage and bearing area.
- Front overhang: Check the intended reveal against manufacturer recommendations.
- Rear alignment: Consider adjoining patios, turf, or planting beds.
- Cap thickness: Choose a profile proportional to the wall and application.
- Bearing surface: Make sure the cap has the support required by the wall system.
- Corners and curves: Confirm that available wall cap shapes work with the layout.
- System compatibility: Review installation details and product limitations.
If you mix brands or product families, verify dimensions, bearing area, and attachment requirements before committing.
A quick tape measure on the actual blocks and caps saves surprises once adhesive makes adjustments difficult.
How to Calculate Retaining Wall Cap Overhang
A basic sizing calculation shows how cap depth, wall depth, and placement work together.
For a straight wall with a flat top course, using the same front and rear reference faces for both measurements: Front overhang = cap depth − wall depth − rear overhang.
Here, rear overhang means the distance the coping extends beyond the back of the top block.
For example, suppose a wall block measures 10 inches deep and a proposed cap measures 12 inches deep. With the back edges aligned and no rear overhang, the calculated front overhang is 2 inches.
That calculation establishes the geometry, not whether a 2-inch overhang is appropriate.
Before choosing that placement, confirm the manufacturer’s requirements for bearing support, wall setback, and cap positioning. The calculation assumes a straightforward alignment; curved walls, tapered coping, and specialty units may require additional layout checks.
The goal of wall cap sizing is to achieve the intended appearance while maintaining proper support and compatibility.
Rochester Concrete Products Wall Cap Sizing Examples
Rochester Concrete Products offers concrete wall caps in different dimensions, profiles, and finishes.
| Rochester Concrete Products cap | Nominal dimensions | Profile |
| 3″ Universal | 12″/10.62″ × 12″ × 3″ high | Split-face front and back |
| 4″ Universal | 18″/14″ × 11″ × 4″ high | Split-face front and back |
| Contemporary | 24″ × 12″ × 2⅜” high | Smooth top and sides with beveled edges |
| Mini-Cap | 8″/6″ × 9¼” × 3″ high | Split-face front and back |
For tapered types, paired measurements indicate the different widths at opposite ends.
Dimensions are nominal.
These products are not interchangeable with every retaining wall system. Confirm compatibility, orientation, colors, and current availability before specifying one.
For complete dimensions and recommended wall-cap pairings, consult the Rochester Concrete Products Wall Reference Guide.
How Much Should Your Retaining Wall Cap Overhang the Face?
A retaining wall cap should have an overhang that looks proportional to the wall and meets the manufacturer’s placement requirements.
A modest front reveal creates a shadow line, can help with weather protection by shedding surface water when the cap profile supports it, and gives the wall a finished appearance.
However, there is no single overhang measurement that works for every retaining wall cap.
The correct amount depends on cap dimensions, wall configuration, bearing requirements, and intended use.
Too little overhang can leave the wall looking flat or expose surfaces that should be covered. Too much can create an awkward projection, interfere with nearby activities, or leave the coping inadequately supported.
As seating, excessive projection can also make the edge uncomfortable.
Practical Overhang Considerations
- Garden and seat walls: Choose a comfortable reveal with adequate support.
- Tall structural walls: Follow the approved system or engineered cap detail.
- Along walks and drives: Avoid projections that interfere with people or equipment.
- Freestanding walls: Consider appearance and coverage on both exposed faces.
- Curved: Check how cap geometry affects the reveal along the curve.
Dry-lay a run of caps, step back 10–15 feet, and look from the angles people actually use.
That view helps you judge whether the reveal feels right.
Then confirm the placement against manufacturer specifications before bonding any coping.
Where wall caps meet pavers, steps, or drives, pay particular attention to clearances and contact with feet, shovels, or snow-removal equipment.
Concrete Wall Coping Specifications: What Should You Verify?
A concrete wall coping spec identifies the coping unit and the details required for proper installation.
In the hardscaping and landscaping project industry, the terms wall cap and wall coping are sometimes used interchangeably.
Both can describe the material used to finish the top of a wall, although architectural coping may involve other solutions and additional drainage or attachment requirements.
For segmental retaining walls, the important point is to specify the actual product, its dimensions, and its installation method.
Concrete Wall Coping Spec Checklist
Before approving a cap selection, confirm:
- Product: Manufacturer, product name, and profile.
- Dimensions: Nominal length, width or depth, and thickness.
- Compatibility: Intended wall system and block configuration.
- Finish: Texture, exposed edges, and selected color.
- Placement: Front and rear overhang, alignment, and setbacks.
- Support: Required bearing area and contact conditions.
- Transitions: Corners, curves, cuts, joints, and elevation changes.
- Attachment: Approved adhesive or other fastening method.
- Installation: Surface preparation, temperature limits, and curing requirements.
- Project details: Applicable engineered drawings and building codes.
Larger projects may also require tolerances, submittals, and approved substitution procedures.
When comparing wall caps, use current manufacturer specifications rather than relying solely on catalog photography.
Rochester Concrete Products provides product information through its concrete wall caps and tops collection and supporting technical resources.
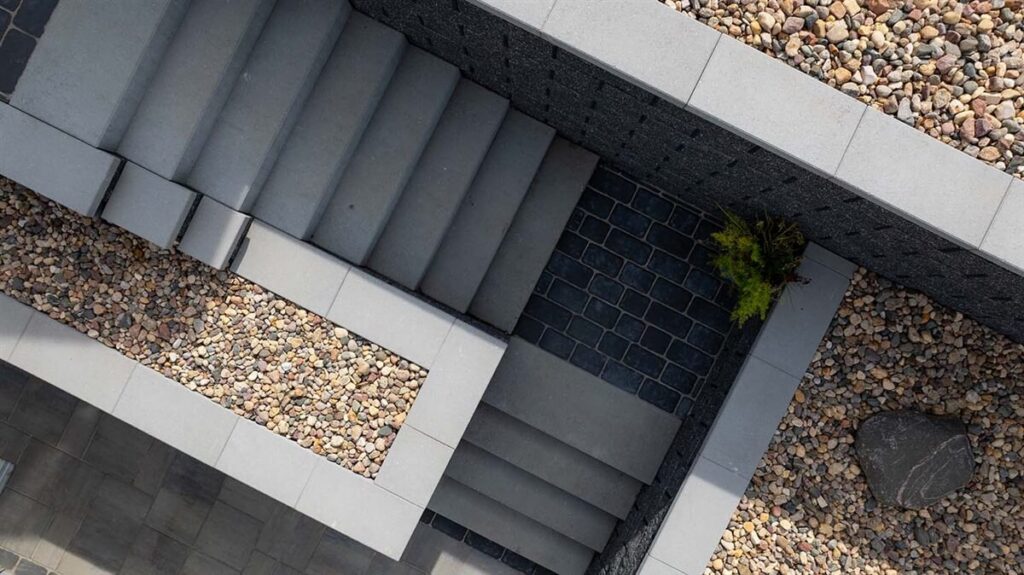
How Should You Handle Corners, Curves, and Steps With Retaining Wall Caps?
Corners, curves, and elevation changes are where cap specifications get tested. You keep them looking intentional by planning cap lengths, cuts, and step-downs before the entire system is finished.
Start your layout at the most visible features—corners, step transitions, or columns—and place less noticeable cuts where they will attract less attention.
Layout Moves That Keep Transitions Clean
- Use dedicated corner coping when the wall system offers them.
- Choose shorter lengths or cut segments for tighter curves, when permitted.
- Plan where height changes occur and step the caps accordingly.
- Keep joint spacing and patterns visually consistent, even when standard widths aren’t possible.
- Let cap joints feel deliberate; they need not always align with block joints.
- Avoid random short pieces or slivers.
- Maintain required bearing and attachment conditions on cut units.
Planning these details on paper, or with a dry-laid mockup, avoids choppy cuts that cheapen an otherwise solid project.
For curved walls and specialty transitions, check whether the manufacturer offers purpose-made units before cutting standard caps.
Which Retaining Wall Cap Profiles, Colors, and Textures Work Best?
The best cap profile feels proportional to the wall height, complements the block texture, and works with nearby surfaces like pavers and steps.
Color should either integrate with the wall or deliberately frame it, not accidentally clash.
On low, fire pit, or seating area wall types, a broader landscape wall cap with a softened edge can look more comfortable and deliberate. On taller structures, a simpler, squarer profile can keep the top from appearing heavy.
Rochester Concrete Products offers wall cap styles that coordinate with compatible retaining wall systems in shape, texture, and a variety of colors. Exact color and weathering characteristics can vary by product, finish, and exposure.
Simple Rules for Cap Appearance
- Match or complement the wall’s texture family.
- Use bolder profiles on short, people-scale walls when appropriate.
- Coordinate with nearby paver and slab colors.
- Keep color counts low to avoid a busy appearance.
- Check samples in natural light before making a final decision.
How to Match Retaining Wall Caps to Different Wall Types
The table below provides a starting point for common applications.
| Wall type | Cap profile to consider | Color strategy |
| Low seat or garden | Broader coping with eased or chamfered edge | Slightly lighter or warmer than the wall |
| Tall structural | Simpler, squarer compatible cap | Integrated or slightly darker tone |
| Steps and landings | Substantial cap or approved step unit | Coordinate with treads and nearby pavers |
| Freestanding columns | Larger with approved overhang | Match the wall or use a contrasting accent |
Rochester Concrete Products Cap Options to Consider
- The 3″ and 4″ Universal Caps provide a traditional split-face appearance in different sizes for compatible wall applications.
- Contemporary Cap offers a cleaner look with smooth surfaces and beveled edges.
- The Mini-Cap provides a compact option designed for Cottage Stone and other compatible smaller applications.
RCP also offers Chiseled Caps and Tops, including straight and radius seat options and specialty tops.
Choose by wall-system compatibility first, then refine the appearance. Treat caps as part of the overall outdoor room, not a separate product line, and the details feel designed instead of assembled.
How Should You Select Adhesive for Retaining Wall Caps?
Use an exterior-rated masonry or landscape block adhesive approved for the concrete units and installation conditions involved.
Do not substitute generic interior construction glue or assume every adhesive labeled for use in outdoor spaces is suitable for retaining wall caps.
The adhesive must also be compatible with the concrete surfaces, not just natural stone, granite, wood, or brick retaining wall caps, as well as compatible with the intended application and overall system requirements.
Some products require dry surfaces and minimum installation temperatures, while others permit different conditions. Always follow the published instructions.
For engineered retaining walls, use the specified cap attachment details rather than general rules of thumb.
Adhesive Selection Checklist
- Approved for the intended exterior masonry application.
- Compatible with the concrete units being bonded.
- Suitable for expected moisture and temperature exposure.
- Clear surface preparation requirements.
- Published installation-temperature and curing limits.
- Manufacturer-specified bead size, spacing, and placement.
- Appropriate performance characteristics for the application.
Adhesive beads may be positioned away from exposed edges to limit squeeze-out, but the correct pattern must come from the product instructions.
Where caps support or connect to rail posts, fences, or safety-related elements, follow the engineered connection details. Do not rely on adhesive alone unless the approved design expressly permits it.
Keeping a proven, approved coping adhesive available for your regular wall systems makes field work consistent and reduces installation problems.
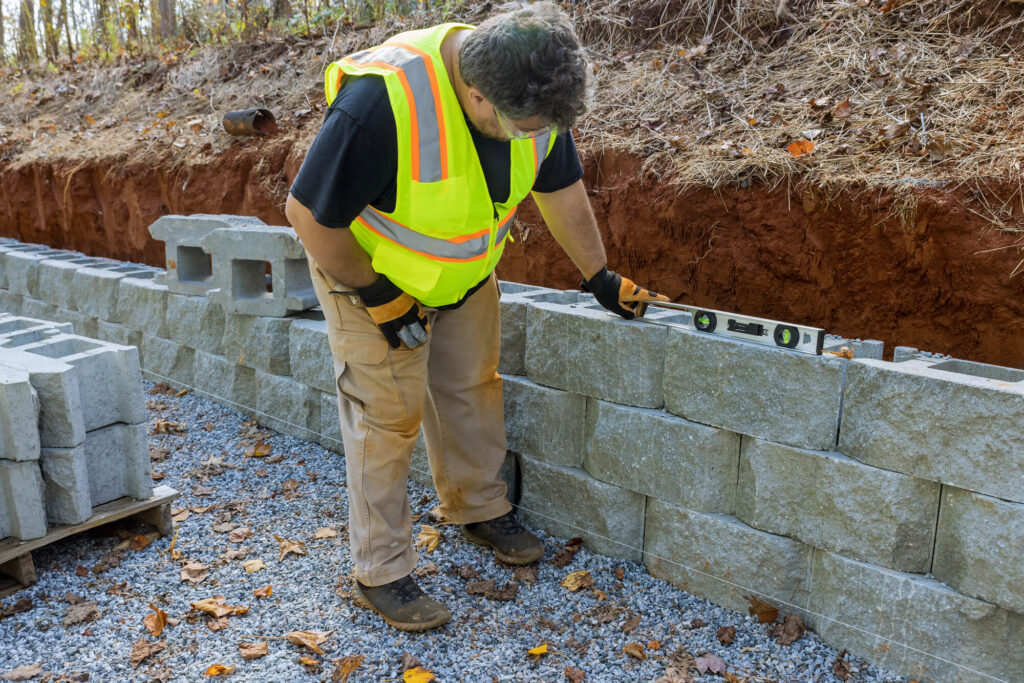
What Is a Reliable Process for Dry-Fitting and Gluing Retaining Wall Caps?
The most reliable cap installations are dry-fitted first, then bonded to a properly prepared top course in manageable sections.
That lets you adjust overhangs, joints, and patterns before adhesive limits your ability to make changes.
Step 1: Dry-Fit the Entire Cap Run
Lay all caps in place without adhesive.
Adjust joints, check the overhang, and confirm corner and step details before opening the adhesive.
Verify that each top has the required support and that the layout follows the wall manufacturer’s installation details.
Step 2: Clean the Top of the Wall
Brush or blow off dust, chips, and loose fines.
Remove standing water and other contaminants. Prepare the surface according to the adhesive manufacturer’s requirements.
Adhesive needs a suitable bonding surface, not debris or a loose slurry film.
Step 3: Apply Adhesive Beads
Lift a few caps at a time and apply adhesive using the bead size, spacing, and placement specified by the manufacturer.
Keep adhesive away from exposed faces where possible, and follow the product’s working-time and temperature limits.
Do not assume that adding more adhesive automatically creates a stronger or more reliable connection.
Step 4: Set and Align Caps
Place each cap carefully, press it into position according to the adhesive instructions, and check the front reveal and back alignment.
Make adjustments within the adhesive’s permitted working time.
Keep people from sitting on, leaning against, or otherwise loading the caps until the adhesive has cured sufficiently for the intended use.
Step 5: Inspect the Finished Cap Run
Check the completed installation for consistent alignment, secure seating, clean joints, and unwanted adhesive residue.
Confirm that corners, transitions, and exposed ends match the planned layout.
Follow the manufacturer’s curing instructions before putting the finished wall into service, and also follow proper maintenance guidelines for long-term protection.
What Retaining Wall Cap Mistakes Cost You the Most Later?
Some of the most expensive retaining wall cap mistakes come from uneven layout, mismatched materials, and adhesives unsuitable for the application.
They may not cause immediate structural problems, but they can make the project look tired long before it should.
You see it in wavy overhangs, mismatched textures, adhesive smeared on the face, or units that start rocking under hand pressure.
Fixing those problems can mean removing bonded caps, cleaning the surfaces, and resetting the run.
Problems Worth Avoiding the First Time
- Mixing coping styles or colors that do not coordinate with the wall.
- Assuming products are compatible because their dimensions look similar.
- Skipping dry-fitting and creating uneven overhangs or awkward cuts.
- Using adhesive unsuitable for the concrete or installation conditions.
- Setting caps over dust, slurry, or standing water contrary to instructions.
- Applying adhesive too close to exposed edges.
- Using an incorrect bead pattern or inadequate bonding area.
- Choosing overhang without checking support requirements.
- Overlooking curves, setbacks, and elevation changes.
On engineered retaining walls, guessing at cap attachment instead of following approved details can create safety and liability concerns, not just appearance problems.
Attention to specifications, layout, and attachment helps prevent callbacks when weather and use expose shortcuts.
The Rochester Concrete Products Approach to Retaining Wall Caps That Last
Every retaining wall you design or build is judged by its finished details, and the cap is one of the most visible. Choosing the right size, overhang, profile, and adhesive completes the wall with a professional finish that complements the surrounding hardscape.
Long-term performance starts with a properly designed and installed wall system. As a third-generation, family-owned concrete manufacturer, Rochester Concrete Products offers coordinated wall and coping options with carefully considered dimensions, textures, and finishes.
Its product specifications, technical documents, and wall reference resources help make it easier to select compatible products that look right together and suit the demands of the project.
Explore Rochester Concrete Products wall caps and tops, review the Wall Reference Guide, or contact our team for help finding the right retaining wall cap for your project.