You can do almost everything right on a paver project—build a solid base, choose quality pavers, make clean cuts, and properly fill the joints—and still experience problems a few years later if the edges are not properly restrained.
Edge failure usually starts subtly. A border begins to wander, a corner softens, or the joints along the outside row stop staying tight. Left unchecked, these small issues can lead to trip hazards, drainage problems, joint-sand loss, and repairs that cost far more than installing the edge correctly in the first place.
That is because paver edge restraint is not merely a decorative accessory. It is a structural component of the pavement system.
Choosing the right paver edge restraint also affects border design, base extension, spike placement, drainage, and the overall installation approach.
In our guide to proper paver installation, we discuss base preparation, bedding material, joint stabilization, and other steps that support long-term performance. This guide focuses specifically on why paver edges fail, what edge restraints do, how the main options compare, when an existing structure may provide adequate restraint, and which installation details help keep pavers locked in place.
Why Paver Edges Are Usually the First Thing to Fail
The perimeter is often the first part of a paver project to show movement because traffic, freeze-thaw cycles, shifting soil, water, and gravity place outward pressure on the pavement.
Without a properly installed edge restraint, the border course has little to prevent it from moving. If the outside row is not supported by a structural restraint bearing on the compacted base, the pavement can gradually spread.
At first, the changes may seem minor. Over time, they can become expensive problems.
Common warning signs include:
- Borders that develop waves, bulges, or gaps, especially along curves
- Edge pavers that begin to rock, tip, or feel soft underfoot
- Joint sand disappearing faster around the perimeter than in the center
- Water collecting along the edge instead of draining away
- Downhill edges slowly creeping outward on sloped installations
- Widening joints or settlement along the outside course
Correcting these problems may require removing pavers, rebuilding part of the base, and retrofitting proper edge restraint after the fact. Installing the right restraint during construction is generally easier and less disruptive than repairing a pavement after the perimeter has begun to move.
Understanding the Role of Edging in a Paver Installation
To understand the importance of paver edging, it helps to understand how a paver system works.
Unlike poured concrete slabs or mortared stone surfaces, interlocking pavers form a flexible pavement system. Each paver relies on the surrounding pavers to distribute loads and maintain surface stability.
This system works because of three key elements:
- A properly compacted gravel base
- A uniform bedding layer of paver sand
- Lateral confinement provided by edge restraints
Without edging along the perimeter, the system has no boundary to contain the pressure within the surface.
Paver Systems Are Designed to Move…Slightly
One advantage of interlocking pavers is flexibility.
Unlike rigid concrete slabs, paver systems can accommodate seasonal ground movement, freeze-thaw cycles, and minor soil settlement without cracking.
However, that flexibility only works when the perimeter of the system is properly contained.
Without adequate perimeter restraint, the surface can gradually spread outward. As compression weakens, the paver system loses alignment and stability.
Interlocking systems rely on confinement.
Edging provides that confinement.
Edging Locks the Pavement System Together
Paver edging is not simply decorative trim.
A properly installed paver system includes:
- A compacted aggregate base
- A uniform bedding layer
- Interlocking pavers
- Joint material
- Edge restraints supported by and anchored into the compacted base
Edge restraints allow these components to function as one pavement system rather than as individual rows of units. They prevent lateral movement at the perimeter, help transfer outward forces back into the compacted base, and reduce the loss of bedding and joint material along the edge.
When an edge restraint is performing correctly, traffic loads and seasonal movement are distributed through the pavement instead of pulling the outside rows apart.
Think of the system this way:
- The pavers create the visible surface.
- The base provides the foundation.
- The bedding and joint materials help distribute loads and stabilize the units.
- The edge restraint forms the structural frame that keeps the system contained.
Without that confinement, even a well-prepared pavement can gradually migrate outward.
Industry guidance from the Concrete Masonry & Hardscapes Association (CMHA). emphasizes the role of edge restraint in maintaining the stability of interlocking pavement systems.
Driveways Require Stronger Edge Support
Driveways place greater stress on paver edges than patios or walkways. Vehicle loads, braking, and turning movements create outward pressure along the perimeter. For that reason, driveway edge restraints must be selected and installed for the anticipated traffic, base design, soil conditions, and climate.
Edging Protects Landscaping and Hardscape Design
Edging also plays an important role in landscape organization and visual design.
Proper landscape edging:
- Separates patios from landscape beds
- Keeps mulch and decorative stone in place
- Maintains clean borders around garden areas
- Helps reduce weed growth along edges
Whether using natural stone borders, landscape bricks, metal edging, plastic edge restraints, or concrete borders, edging protects both the structure and the appearance of the project.
Paver Edge Restraint Is Structural, but It Is Not Always a Separate Product
A paver pavement needs positive perimeter confinement. However, that confinement does not always require a separate plastic, metal, or concrete edging product.
In some installations, a sound permanent structure may already perform the restraint function. Examples include:
- Concrete curbs
- Foundation walls
- Existing concrete slabs
- Permanent masonry elements
- Pavements confined between rigid structures
For an existing hard edge to function as a restraint, the pavement base must extend to and integrate properly with it, and the adjoining structure must be capable of resisting lateral movement.
A dedicated edge-restraint system should generally be included when:
- The pavement will carry vehicle traffic
- The site experiences freeze-thaw cycles
- Expansive soil or an unstable subgrade is present
- The project contains curves, elevation changes, steps, or complex borders
- The pavement uses an open-graded aggregate base, including many permeable systems
Decorative landscape edging should not automatically be treated as structural pavement restraint. The correct detail depends on the product, installation method, anticipated loads, site conditions, manufacturer guidance, and project specifications.
What Happens When Edging Is Skipped or Installed Incorrectly
Paver-edge failure usually develops in stages. Once the perimeter loses lateral confinement, movement can spread inward and affect the rest of the pavement system.
1. The Perimeter Loses Confinement
The first stage begins when the edge restraint loosens, shifts, or fails to bear properly on the compacted base.
Without firm confinement, the outside pavers can move outward under traffic, soil pressure, gravity, freeze-thaw movement, and water.
2. Joints Begin to Widen
As the border course moves, joints near the perimeter open.
This weakens interlock between the pavers and allows joint material to loosen or wash out. The outer rows may then begin to rock, tilt, or settle.
3. Bedding and Base Materials Become Exposed
Once joints and edges open, water and surrounding soil can enter the pavement system.
This may cause:
- Bedding material to wash out
- Soil to mix with joint sand
- Mulch or gravel to migrate onto the pavement
- The base near the edge to soften or erode
Drainage problems and freeze-thaw cycles can accelerate this deterioration.
4. The Border Course Deforms
As support weakens, the perimeter may lose alignment.
On patios and walkways, this can appear as uneven borders, rocking pavers, or settlement. On driveways, repeated vehicle loads may cause the outer rows to spread, distort, or sink.
5. Movement Spreads Inward
Edge failure rarely remains isolated at the perimeter.
As confinement is lost, adjacent pavers also lose support and alignment. Over time, the affected area can expand inward, increasing the amount of pavement that must be removed and rebuilt.
Installing the correct edge restraint during construction is generally easier and less disruptive than repairing a pavement after the failure has progressed.
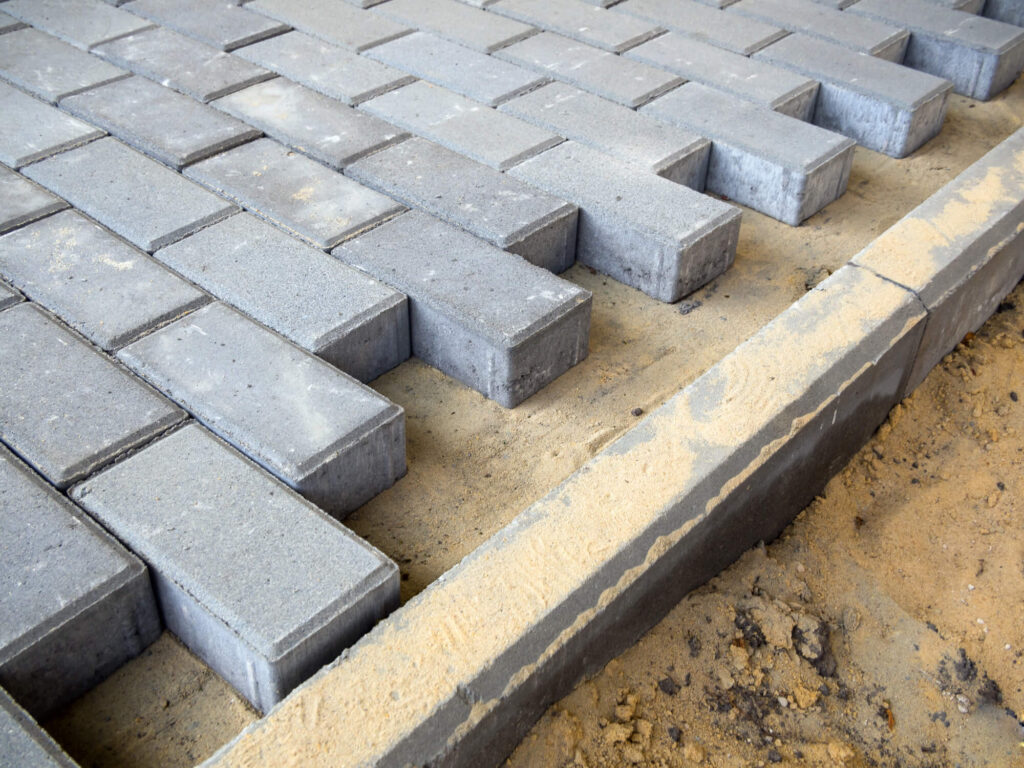
Common Types of Paver Edging Used in Hardscape Projects
The right edging system depends on several factors:
- Application (patio vs driveway)
- Load requirements
- Soil conditions
- Landscape design
- Budget
- Desired aesthetics
Below are the most common edging systems used in professional hardscape installations.
Decorative Concrete Edgers
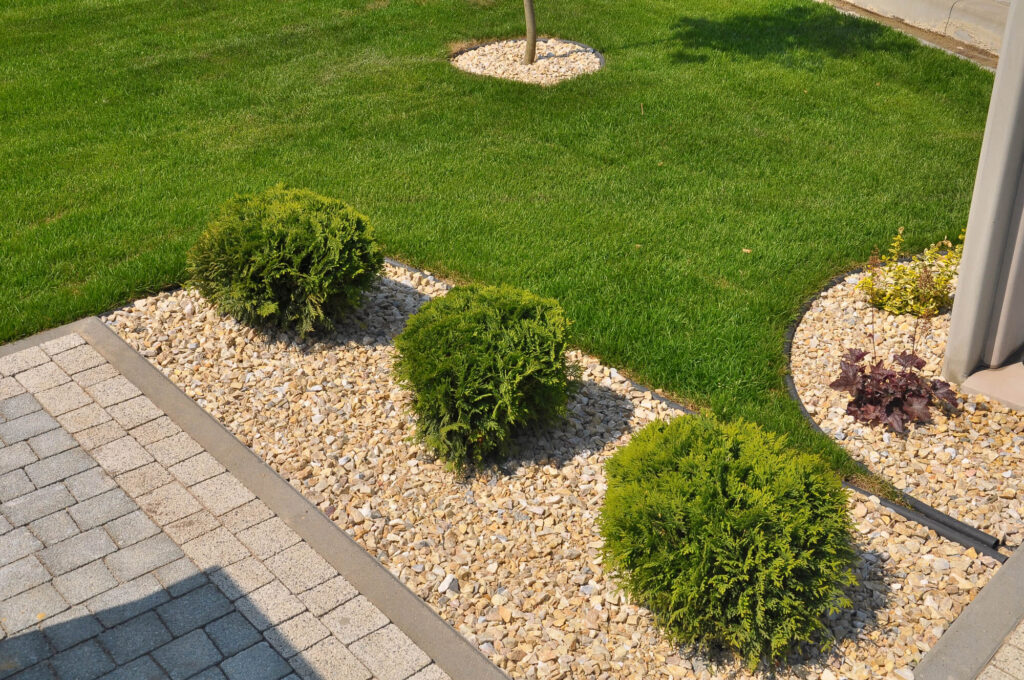
Decorative concrete edgers create a clean, durable transition between pavers, lawns, mulch, decorative stone, and planting areas. They can define straight borders or curved landscape features while giving the project a finished appearance.
However, decorative concrete edgers and structural paver edge restraints do not always serve the same function. A landscape edger should not automatically be treated as the structural restraint for an interlocking pavement unless its product design and installation detail are intended for that purpose.
In many projects, the visible concrete edger provides landscape separation while the structural restraint comes from heavy-duty plastic edging, metal edging, a cementitious toe, a curb, or another engineered detail installed beneath or behind the border.
At Rochester Concrete Products, decorative edging options include:
Bullet Edger™
A versatile edging product designed for smooth curves and easy installation around landscape features.
Granite Edger™
A natural-looking edging solution that delivers the rustic appearance of stone and durable landscape separation.
For landscape applications, these products can provide attractive, lasting borders. For driveways, porcelain paver systems, commercial pavements, and other higher-load applications, confirm that the installation also includes a structural edge-restraint detail suitable for the expected loads.
Plastic Edging
Plastic edge restraints are among the most commonly used edging systems for patios and walkways.
Advantages include:
- Flexible design for curves and organic shapes
- Affordable cost
- Easy installation
- Compatibility with most concrete and porcelain pavers
Plastic edge restraint should be installed directly on the extended compacted base, not on loose soil or bedding sand. Secure it with manufacturer-approved, corrosion-resistant spikes that penetrate the compacted aggregate.
Fastener spacing should be close enough to prevent movement. Curves, corners, transitions, and higher-load areas generally require additional fastening.
Before securing the restraint, confirm that the border course is aligned and that the vertical face of the edging remains in continuous contact with the outside row of pavers. Always follow the manufacturer’s recommendations for spike type, length, and spacing.
Metal Edging
Metal edging systems — usually aluminum or steel — provide greater rigidity than plastic restraints.
Benefits include:
- Crisp, modern design lines
- Higher structural strength
- Improved resistance to soil movement
- Long-term durability
Metal edging is often selected for high-end landscape designs where sharp, clean borders are desired.
For reliable performance, metal edging should be installed directly on the extended compacted base and secured with manufacturer-approved stakes or pins.
Additional fastening may be needed around curves, corners, joints, and transitions. In regions where deicing salts are common, select corrosion-resistant materials and finishes.
Where snow-removal equipment will cross the area, keep the exposed metal edge slightly below the finished pavement grade. Appropriate movement allowances may also be needed where metal edging meets concrete walks, curbs, or other rigid structures.
Cementitious Edging
Cementitious edging provides rigid structural containment for paver installations where a cement-based edge detail is appropriate. Instead of relying on plastic or metal restraint, this method places a concrete or mortar toe directly against the outside paver course to help lock the perimeter in place.
This type of edging is commonly used in premium patio installations, porcelain paver systems, and high-traffic hardscape applications where additional stability is required.
Cementitious edging is typically created by placing a small concrete or mortar “toe” along the perimeter of the paver installation. This edge detail supports the outside paver course against the compacted base and helps resist outward movement over time.
Benefits of Cementitious Edging
Cementitious edge restraints offer several advantages compared to lighter edging systems:
- Exceptional structural stability for patios, walkways, and driveway borders
- Superior resistance to lateral movement caused by traffic, soil pressure, or freeze–thaw cycles
- Long-term durability in climates with heavy rainfall or seasonal ground movement
- Clean perimeter support that remains hidden beneath the finished surface
Because the material hardens after installation, cementitious edging forms a rigid barrier that helps maintain compression within the paver system.
Ideal Applications for Cementitious Edging
Cementitious edging is commonly used in installations where additional structural containment is needed, including:
- Porcelain paver systems such as GeoCeramica®
- High-end patio installations
- Walkways exposed to frequent traffic
- Pool decks and outdoor kitchens
- Paver installations where plastic edging may be less effective
Many contractors prefer cementitious edging for large-format porcelain pavers because it helps maintain alignment and stability along the perimeter.
Concrete Curb Systems
For maximum structural containment, some installations use poured concrete curbs or reinforced concrete toe systems.
These systems may include:
- Poured concrete edging
- Reinforced concrete curbs
- Rebar reinforcement
- Hidden concrete containment
Concrete curb systems are commonly used in:
- Paver driveways
- Commercial hardscape projects
- Heavy traffic areas
- Parking spaces
They provide excellent resistance to long-term edge spreading.
Concrete toes and curbs should be supported by the compacted pavement base rather than placed directly on topsoil or unsupported subgrade. They should be sized for the expected traffic and loads, bear tightly against the outside paver course, and transfer lateral forces back into the pavement structure.
In freeze-thaw climates, use concrete designed for exterior exposure and allow it to cure properly before opening the area to traffic. Reinforcement or fibers may be appropriate where vehicle loads, soil conditions, engineered plans, or project specifications require additional strength.
Natural Stone and Brick Borders
Decorative borders are sometimes integrated directly into the landscape design.
Examples include:
- Natural stone edging
- Brick paver borders
- Decorative concrete borders
These materials can enhance the visual appeal of a patio or walkway, but the border detail must still provide adequate lateral confinement. Depending on the application, that support may come from mortar, a reinforced base, concealed edging, a concrete toe, or another engineered restraint installed behind the visible border.
The border course and edge restraint should be planned as one system. Avoid narrow sliver cuts along the perimeter because small pieces are more difficult to contain and more susceptible to movement.
Around curves, maintain consistent cuts and continuous contact between the outside pavers and the restraint. Gaps can allow the border course to shift outward.
Drainage should direct water away from the perimeter so it does not wash out bedding material or soften the base beneath the border.
Paver Edge Restraint Comparison
The appropriate restraint depends on traffic, base construction, soil conditions, climate, drainage, and pavement design.
| Edge-restraint type | Common applications | Main considerations |
| Heavy-duty plastic or composite restraint | Patios, walkways, and some residential driveways | Flexible and relatively easy to install; requires adequate base support and properly spaced spikes. |
| Steel or aluminum restraint | Patios, walkways, entryways, and designs requiring crisp lines | Provides a clean, rigid border; requires suitable stake spacing and corrosion resistance. |
| Cementitious toe or cast-in-place concrete | Driveways, commercial pavements, plow routes, porcelain pavers, and many permeable systems | Provides strong containment; must bear on the compacted base and be designed for the expected loads and climate. |
| Existing hard edge | Areas bordered by a sound curb, slab, foundation, or masonry structure | Works only when the structure can resist lateral movement and the pavement base properly ties into it. |
| Decorative concrete edger | Garden beds, landscape borders, walkways, and accent edges | Provides visual separation and a finished appearance; should not automatically replace engineered structural restraint. |
Edging Requirements for Different Applications
Not every paver installation requires the same edging strategy. The correct edge restraint system depends on factors such as load conditions, soil stability, climate, and the overall design of the hardscape.
Understanding the demands of each application helps ensure that the edging system provides the right level of structural containment and long-term stability for the paver surface.
Patios and Walkways
For patios, walkways, and garden borders, edging primarily needs to resist foot traffic and moderate lateral pressure from the surrounding landscape and soil.
Common edging solutions include:
- Plastic edge restraints secured with spikes
- Metal edging for clean, modern borders
- Natural stone or brick borders integrated into the design
Because patios often sit adjacent to landscape beds, mulch, or decorative rock, edging also helps prevent soil and organic material from migrating into the paver joints and bedding sand.
Even in these lighter-duty applications, edging must still be anchored securely into the compacted base material—not loose soil or bedding sand—to maintain long-term stability.
Paver Driveways and Parking Areas
Paver driveways and parking areas require edge-restraint systems designed for repeated vehicle loads, turning movements, braking forces, and seasonal ground movement.
Suitable restraint details may include:
- Cast-in-place concrete curbs
- Cementitious edge restraints
- Heavy-duty metal or composite systems
- Reinforced border details specified for vehicular applications
- Existing concrete curbs or structures that provide adequate confinement
The restraint must bear on the compacted base, remain in continuous contact with the outside paver course, and be installed according to the product manufacturer’s guidance or project specifications.
If the edge-restraint system is undersized, poorly anchored, or supported by loose soil, the driveway perimeter may spread, settle, or lose alignment over time.
Raised Patios, Fire Features, and Structural Elements
Projects that incorporate raised patios, fire features, retaining elements, or integrated lighting often require stronger structural containment than standard patio installations.
Examples include designs with:
- Fire pits or fireplaces
- Retaining walls or raised seating areas
- LED lighting integrated into paver borders
- Pedestal systems for rooftop installations
- Elevated outdoor living spaces
In these situations, the edging system may tie directly into more substantial structural components such as:
- Mortared paver borders
- Concrete slab edges
- Reinforced structural hardscape elements
Because these projects often involve larger investments and more complex structural conditions, the edge-restraint system should be designed to match the demands of the installation.
Gravel Driveways and Hybrid Installations
In some landscape designs, pavers are installed adjacent to other surfaces such as gravel driveways, crushed stone paths, or decorative aggregate areas. These hybrid installations place additional importance on proper edging.
A well-installed edge restraint helps:
- Keep gravel contained within its designated area
- Prevent materials from mixing with the paver joints
- Maintain clean visual transitions between surfaces
- Protect the structural integrity of the paver system
Without proper edging, gravel and soil can migrate into the paver installation over time, weakening joint performance and reducing overall stability.
Edging Defines the Look of Your Landscape Design
Beyond structural support and long-term stability, edging plays a major role in the overall appearance of a hardscape installation. Well-designed and properly installed paver edging helps define the space and gives outdoor living areas a finished, intentional look.
Clean, properly installed paver edging creates:
- Crisp borders around patios and walkways
- Defined hardscape lines that feel intentional and professionally built
- Clear separation between lawn areas and paved surfaces
- Smooth transitions between pavers and landscape beds
The type of edging material used can also influence the overall design aesthetic of the project.
Concrete paver borders offer strong visual definition, excellent durability, and design flexibility. They are commonly used around driveways, patios, and structured landscape designs. Rochester Concrete Products’ Bullet Edger™ and Granite Edger™ provide durable visual definition for curved or straight landscape borders. Where structural pavement confinement is required, pair the visible border with an edge-restraint detail appropriate for the application.
Cementitious edging is another common solution, particularly for porcelain paver systems and high-end patio installations. In this method, a concrete or mortar “toe” is installed along the perimeter of the pavers to lock the edge of the system into place. Cementitious edging is typically hidden beneath the finished surface, but it provides excellent lateral containment while maintaining a clean, seamless border around the installation.
Natural stone edging offers a timeless, organic border that blends naturally with traditional landscape designs and garden environments.
Metal edging creates sharp, precise lines that complement modern landscape architecture and contemporary outdoor living spaces.
Plastic edge restraints remain hidden beneath the surface, allowing the visual focus to stay entirely on the paver pattern and material while still providing structural containment.
Whether you’re installing brick pavers, porcelain pavers, or concrete pavers, the edge system ultimately frames the project. It enhances visual appeal and helps ensure that the landscape design feels complete—not simply constructed, but thoughtfully finished.
In hardscape design, the edge is where structure meets aesthetics.
And when installed correctly, it elevates the entire outdoor space.
Key Installation Requirements for Paver Edge Restraints
The exact installation method depends on the restraint material, pavement design, site conditions, and manufacturer instructions. However, effective edge-restraint systems share several core requirements.
Support the Restraint on the Compacted Base
The compacted aggregate base must extend beyond the paver field far enough to support the edge restraint. Structural edging should not be installed directly on topsoil, loose soil, or bedding sand.
Maintain Continuous Contact
The restraint should remain tight against the outside paver course without gaps. Around curves, corners, and transitions, follow the manufacturer’s instructions for shaping and fastening the restraint.
Use the Specified Anchoring Method
Use manufacturer-approved spikes, stakes, pins, concrete, or other specified anchoring methods. Fastener spacing and reinforcement should reflect the restraint type, pavement loads, layout, and site conditions.
Backfill and Inspect the Perimeter
Backfill the outside of the restraint with suitable compactible material. Before completing the project, confirm that the edging does not roll, loosen, separate from the border course, or interfere with drainage.
For the complete paver installation sequence—including excavation, base preparation, bedding sand, laying pavers, edge restraints, compaction, and joint filling—see our guide to installing concrete pavers.
When a Professional Should Install Edging
While many homeowners can handle small landscaping upgrades, edging is not an area where shortcuts pay off.
In certain applications, improper edge restraint installation can compromise the entire hardscape.
Here are situations where professional installation is strongly recommended.
Large Paver Driveways and Parking Areas
Professional design or installation is recommended for wide driveways, multiple parking spaces, commercial entrances, and other pavements exposed to frequent or concentrated vehicle loads.
A qualified installer can evaluate:
- Base depth and extension
- Edge-restraint type and sizing
- Soil and drainage conditions
- Turning and braking areas
- Freeze-thaw exposure
- Transitions to curbs, garages, sidewalks, or roadways
Professional oversight is especially valuable when the project requires concrete containment, reinforcement, engineered details, or integration with existing structures.
Sloped Sites and Challenging Soil Conditions
Seasonal climates, expansive soil movement, or heavy rainfall introduce additional stress along the perimeter of a paver installation.
On sloped landscape areas:
- Gravity increases lateral pressure
- Water drainage impacts edge performance
- Soil erosion weakens poorly anchored edging
Clay-rich soil and freeze-thaw regions intensify these forces.
In these cases, a professional can determine whether reinforced edging, deeper anchoring, or concrete containment systems are required.
Complex Landscape Designs
Projects that include:
- Curved walkways
- Garden borders
- Fire features
- Integrated LED lights
- Raised patios
- Pedestal systems
- Mortared pavers
Require careful planning to ensure edging integrates structurally and aesthetically. Professional installers understand how edging supports both the structural and visual goals of the landscape.
High-Visibility or High-Investment Projects
For prominent or high-investment hardscape projects, visible edge failure can compromise both appearance and long-term performance.
Repairing a failed perimeter may require partial disassembly of the paver surface, correction of the supporting base, and installation of a new restraint system. Professional planning and installation can help reduce the likelihood of these avoidable repairs.
Quick Checklist: What Proper Paver Edging Should Include
Before considering a paver installation complete, confirm the edging system includes:
✔ Edge restraints installed tightly against pavers
✔ Anchored into compacted gravel base, not soil or sand
✔ Edge-restraint type appropriate for the expected loads, base design, soil conditions, and climate
✔ Reinforcement or concrete containment where required by the design, manufacturer, or project specifications
✔ Backfill compacted along the exterior side
✔ Integration with drainage plan
✔ Continuous contact between the edge restraint and the outside paver course
✔ Border cuts large enough to remain stable and properly restrained
✔ Clean transition between hardscape and landscape bed
If any of these elements are missing, long-term stability may be compromised.
Strong Edges Protect Strong Foundations
We’ve frequently mentioned how a proper paver base supports the performance of concrete pavers and every concrete paver installation.
But a strong foundation is only part of the equation.
Edging protects that foundation.
Without proper paver patio edging, lawn edging, or landscape edging, even the best compacted gravel base, perfectly screeded paver sand, and tightly installed paving slabs or concrete paver surfaces cannot maintain compression over time. Whether you’re installing pavers for a patio, walkway, or driveway, edge restraint is critical.
At Rochester Concrete Products, we manufacture premium concrete pavers engineered for performance when properly installed, along with our own Bullet Edger™ and Granite Edger™ options. We also support a range of edging solutions, including steel edging and plastic edging, depending on the application. Our team provides comprehensive installation resources, technical guides, and educational materials to support both contractors and DIY homeowners exploring garden edging ideas and structural solutions.
If you’re planning a patio, walkway, or paver driveway:
- Consult a qualified professional for edging and structural installation, especially for driveway edging where durability is essential
- Visit the Rochester Concrete Products website for installation guides and technical resources related to installing pavers
- Explore our full collection of concrete pavers to enhance your outdoor living spaces and increase property value
Because when it comes to pavers, the base provides the support, but the edges protect the investment.
Strong Edges Protect the Entire Paver System
A properly prepared base supports a paver installation, but the perimeter restraint helps preserve that support.
Without adequate confinement, traffic, freeze-thaw cycles, water, soil movement, and gravity can gradually push the pavement outward. As the perimeter moves, joints widen, border courses lose alignment, and bedding or joint materials may escape.
The right edge detail depends on the complete project—not just the appearance of the border. Consider:
- Pedestrian or vehicle loads
- Base construction
- Soil and drainage conditions
- Freeze-thaw exposure
- Curves, slopes, and elevation changes
- Border-paver size and layout
- The edge-restraint manufacturer’s instructions
- Engineered plans and project specifications where applicable
Rochester Concrete Products offers concrete pavers, decorative edging products, accessories, installation resources, and dealer support for residential and professional hardscape projects.
Explore our paver and edging collections, review the available technical resources, or consult a qualified hardscape professional to determine the appropriate edge-restraint detail for your project.
The base provides the support. The edge restraint keeps the pavement contained.